
搜索到
18
篇与
的结果
-
 k8s 1.28高可用搭建containerd集群08 1 containerd 部署1.1 Containerd安装及配置获取软件包wget https://github.com/containerd/containerd/releases/download/v1.7.9/cri-containerd-cni-1.7.9-linux-amd64.tar.gz 1.2 安装containerdtar -xf cri-containerd-cni-1.7.9-linux-amd64.tar.gz -C / 默认解压后会有如下目录: etc opt usr 会把对应的目解压到/下对应目录中,这样就省去复制文件步骤。 1.3 生成配置文件并修改mkdir /etc/containerd containerd config default >/etc/containerd/config.toml # ls /etc/containerd/ config.toml 下面的配置文件中已修改,可不执行,仅修改默认时执行。 sed -i 's@systemd_cgroup = false@systemd_cgroup = true@' /etc/containerd/config.toml 下面的配置文件中已修改,可不执行,仅修改默认时执行。 sed -i 's@registry.k8s.io/pause:3.8@registry.aliyuncs.com/google_containers/pause:3.9@' /etc/containerd/config.toml # [root@k8s-node02 k8s-work]# cat /etc/containerd/config.toml disabled_plugins = [] imports = [] oom_score = 0 plugin_dir = "" required_plugins = [] root = "/var/lib/containerd" state = "/run/containerd" temp = "" version = 2 [cgroup] path = "" [debug] address = "" format = "" gid = 0 level = "" uid = 0 [grpc] address = "/run/containerd/containerd.sock" gid = 0 max_recv_message_size = 16777216 max_send_message_size = 16777216 tcp_address = "" tcp_tls_ca = "" tcp_tls_cert = "" tcp_tls_key = "" uid = 0 [metrics] address = "" grpc_histogram = false [plugins] [plugins."io.containerd.gc.v1.scheduler"] deletion_threshold = 0 mutation_threshold = 100 pause_threshold = 0.02 schedule_delay = "0s" startup_delay = "100ms" [plugins."io.containerd.grpc.v1.cri"] cdi_spec_dirs = ["/etc/cdi", "/var/run/cdi"] device_ownership_from_security_context = false disable_apparmor = false disable_cgroup = false disable_hugetlb_controller = true disable_proc_mount = false disable_tcp_service = true drain_exec_sync_io_timeout = "0s" enable_cdi = false enable_selinux = false enable_tls_streaming = false enable_unprivileged_icmp = false enable_unprivileged_ports = false ignore_image_defined_volumes = false image_pull_progress_timeout = "1m0s" max_concurrent_downloads = 3 max_container_log_line_size = 16384 netns_mounts_under_state_dir = false restrict_oom_score_adj = false sandbox_image = "registry.aliyuncs.com/google_containers/pause:3.9" selinux_category_range = 1024 stats_collect_period = 10 stream_idle_timeout = "4h0m0s" stream_server_address = "127.0.0.1" stream_server_port = "0" systemd_cgroup = true tolerate_missing_hugetlb_controller = true unset_seccomp_profile = "" [plugins."io.containerd.grpc.v1.cri".cni] bin_dir = "/opt/cni/bin" conf_dir = "/etc/cni/net.d" conf_template = "" ip_pref = "" max_conf_num = 1 setup_serially = false [plugins."io.containerd.grpc.v1.cri".containerd] default_runtime_name = "runc" disable_snapshot_annotations = true discard_unpacked_layers = false ignore_blockio_not_enabled_errors = false ignore_rdt_not_enabled_errors = false no_pivot = false snapshotter = "overlayfs" [plugins."io.containerd.grpc.v1.cri".containerd.default_runtime] base_runtime_spec = "" cni_conf_dir = "" cni_max_conf_num = 0 container_annotations = [] pod_annotations = [] privileged_without_host_devices = false privileged_without_host_devices_all_devices_allowed = false runtime_engine = "" runtime_path = "" runtime_root = "" runtime_type = "" sandbox_mode = "" snapshotter = "" [plugins."io.containerd.grpc.v1.cri".containerd.default_runtime.options] [plugins."io.containerd.grpc.v1.cri".containerd.runtimes] [plugins."io.containerd.grpc.v1.cri".containerd.runtimes.runc] base_runtime_spec = "" cni_conf_dir = "" cni_max_conf_num = 0 container_annotations = [] pod_annotations = [] privileged_without_host_devices = false privileged_without_host_devices_all_devices_allowed = false runtime_engine = "" runtime_path = "" runtime_root = "" runtime_type = "io.containerd.runc.v2" sandbox_mode = "podsandbox" snapshotter = "" [plugins."io.containerd.grpc.v1.cri".containerd.runtimes.runc.options] BinaryName = "" CriuImagePath = "" CriuPath = "" CriuWorkPath = "" IoGid = 0 IoUid = 0 NoNewKeyring = false NoPivotRoot = false Root = "" ShimCgroup = "" SystemdCgroup = false [plugins."io.containerd.grpc.v1.cri".containerd.untrusted_workload_runtime] base_runtime_spec = "" cni_conf_dir = "" cni_max_conf_num = 0 container_annotations = [] pod_annotations = [] privileged_without_host_devices = false privileged_without_host_devices_all_devices_allowed = false runtime_engine = "" runtime_path = "" runtime_root = "" runtime_type = "" sandbox_mode = "" snapshotter = "" [plugins."io.containerd.grpc.v1.cri".containerd.untrusted_workload_runtime.options] [plugins."io.containerd.grpc.v1.cri".image_decryption] key_model = "node" [plugins."io.containerd.grpc.v1.cri".registry] config_path = "" [plugins."io.containerd.grpc.v1.cri".registry.auths] [plugins."io.containerd.grpc.v1.cri".registry.configs] [plugins."io.containerd.grpc.v1.cri".registry.headers] [plugins."io.containerd.grpc.v1.cri".registry.mirrors] [plugins."io.containerd.grpc.v1.cri".x509_key_pair_streaming] tls_cert_file = "" tls_key_file = "" [plugins."io.containerd.internal.v1.opt"] path = "/opt/containerd" [plugins."io.containerd.internal.v1.restart"] interval = "10s" [plugins."io.containerd.internal.v1.tracing"] sampling_ratio = 1.0 service_name = "containerd" [plugins."io.containerd.metadata.v1.bolt"] content_sharing_policy = "shared" [plugins."io.containerd.monitor.v1.cgroups"] no_prometheus = false [plugins."io.containerd.nri.v1.nri"] disable = true disable_connections = false plugin_config_path = "/etc/nri/conf.d" plugin_path = "/opt/nri/plugins" plugin_registration_timeout = "5s" plugin_request_timeout = "2s" socket_path = "/var/run/nri/nri.sock" [plugins."io.containerd.runtime.v1.linux"] no_shim = false runtime = "runc" runtime_root = "" shim = "containerd-shim" shim_debug = false [plugins."io.containerd.runtime.v2.task"] platforms = ["linux/amd64"] sched_core = false [plugins."io.containerd.service.v1.diff-service"] default = ["walking"] [plugins."io.containerd.service.v1.tasks-service"] blockio_config_file = "" rdt_config_file = "" [plugins."io.containerd.snapshotter.v1.aufs"] root_path = "" [plugins."io.containerd.snapshotter.v1.blockfile"] fs_type = "" mount_options = [] root_path = "" scratch_file = "" [plugins."io.containerd.snapshotter.v1.btrfs"] root_path = "" [plugins."io.containerd.snapshotter.v1.devmapper"] async_remove = false base_image_size = "" discard_blocks = false fs_options = "" fs_type = "" pool_name = "" root_path = "" [plugins."io.containerd.snapshotter.v1.native"] root_path = "" [plugins."io.containerd.snapshotter.v1.overlayfs"] mount_options = [] root_path = "" sync_remove = false upperdir_label = false [plugins."io.containerd.snapshotter.v1.zfs"] root_path = "" [plugins."io.containerd.tracing.processor.v1.otlp"] endpoint = "" insecure = false protocol = "" [plugins."io.containerd.transfer.v1.local"] config_path = "" max_concurrent_downloads = 3 max_concurrent_uploaded_layers = 3 [[plugins."io.containerd.transfer.v1.local".unpack_config]] differ = "" platform = "linux/amd64" snapshotter = "overlayfs" [proxy_plugins] [stream_processors] [stream_processors."io.containerd.ocicrypt.decoder.v1.tar"] accepts = ["application/vnd.oci.image.layer.v1.tar+encrypted"] args = ["--decryption-keys-path", "/etc/containerd/ocicrypt/keys"] env = ["OCICRYPT_KEYPROVIDER_CONFIG=/etc/containerd/ocicrypt/ocicrypt_keyprovider.conf"] path = "ctd-decoder" returns = "application/vnd.oci.image.layer.v1.tar" [stream_processors."io.containerd.ocicrypt.decoder.v1.tar.gzip"] accepts = ["application/vnd.oci.image.layer.v1.tar+gzip+encrypted"] args = ["--decryption-keys-path", "/etc/containerd/ocicrypt/keys"] env = ["OCICRYPT_KEYPROVIDER_CONFIG=/etc/containerd/ocicrypt/ocicrypt_keyprovider.conf"] path = "ctd-decoder" returns = "application/vnd.oci.image.layer.v1.tar+gzip" [timeouts] "io.containerd.timeout.bolt.open" = "0s" "io.containerd.timeout.metrics.shimstats" = "2s" "io.containerd.timeout.shim.cleanup" = "5s" "io.containerd.timeout.shim.load" = "5s" "io.containerd.timeout.shim.shutdown" = "3s" "io.containerd.timeout.task.state" = "2s" [ttrpc] address = "" gid = 0 uid = 0 2 下载libseccomp-2.5.1版本的软件包wget http://rpmfind.net/linux/centos/8-stream/BaseOS/x86_64/os/Packages/libseccomp-2.5.1-1.el8.x86_64.rpm 2.1 安装libseccomp-2.5.1软件包#卸载原来的 rpm -qa | grep libseccomp libseccomp-devel-2.3.1-4.el7.x86_64 libseccomp-2.3.1-4.el7.x86_64 rpm -e libseccomp-devel-2.3.1-4.el7.x86_64 --nodeps rpm -e libseccomp-2.3.1-4.el7.x86_64 --nodeps rpm -ivh libseccomp-2.5.1-1.el8.x86_64.rpm 2.2 检查安装的版本,安装成功啦rpm -qa | grep libseccomp 2.3 安装runc由于上述软件包中包含的runc对系统依赖过多,所以建议单独下载安装。默认runc执行时提示:runc: symbol lookup error: runc: undefined symbol: seccomp_notify_respondwget https://github.com/opencontainers/runc/releases/download/v1.1.10/runc.amd64 chmod +x runc.amd64 替换掉原软件包中的runc mv runc.amd64 /usr/local/sbin/runc # runc -v VERSION: 1.1.10 commit: v1.1.10-0-g18a0cb0f spec: 1.0.2-dev go: go1.20.10 libseccomp: 2.5.1 systemctl enable --now containerd systemctl status containerd
 -
k8s 1.28高可用搭建 kubelet集群09 1 部署kubelet在k8s-master01上操作 1.1 创建kubelet-bootstrap.kubeconfigBOOTSTRAP_TOKEN=$(awk -F "," '{print $1}' /etc/kubernetes/token.csv) kubectl config set-cluster kubernetes --certificate-authority=ca.pem --embed-certs=true --server=https://192.168.31.100:6443 --kubeconfig=kubelet-bootstrap.kubeconfig kubectl config set-credentials kubelet-bootstrap --token=${BOOTSTRAP_TOKEN} --kubeconfig=kubelet-bootstrap.kubeconfig kubectl config set-context default --cluster=kubernetes --user=kubelet-bootstrap --kubeconfig=kubelet-bootstrap.kubeconfig kubectl config use-context default --kubeconfig=kubelet-bootstrap.kubeconfig kubectl create clusterrolebinding cluster-system-anonymous --clusterrole=cluster-admin --user=kubelet-bootstrap kubectl create clusterrolebinding kubelet-bootstrap --clusterrole=system:node-bootstrapper --user=kubelet-bootstrap --kubeconfig=kubelet-bootstrap.kubeconfig kubectl describe clusterrolebinding cluster-system-anonymous kubectl describe clusterrolebinding kubelet-bootstrap 2 创建kubelet配置文件cat > kubelet.json << "EOF" { "kind": "KubeletConfiguration", "apiVersion": "kubelet.config.k8s.io/v1beta1", "authentication": { "x509": { "clientCAFile": "/etc/kubernetes/ssl/ca.pem" }, "webhook": { "enabled": true, "cacheTTL": "2m0s" }, "anonymous": { "enabled": false } }, "authorization": { "mode": "Webhook", "webhook": { "cacheAuthorizedTTL": "5m0s", "cacheUnauthorizedTTL": "30s" } }, "address": "192.168.31.34", "port": 10250, "readOnlyPort": 10255, "cgroupDriver": "systemd", "hairpinMode": "promiscuous-bridge", "serializeImagePulls": false, "clusterDomain": "cluster.local.", "clusterDNS": ["10.96.0.2"] } EOF 2.1 创建kubelet服务启动管理文件cat > kubelet.service << "EOF" [Unit] Description=Kubernetes Kubelet Documentation=https://github.com/kubernetes/kubernetes After=containerd.service Requires=containerd.service [Service] WorkingDirectory=/var/lib/kubelet ExecStart=/usr/local/bin/kubelet \ --bootstrap-kubeconfig=/etc/kubernetes/kubelet-bootstrap.kubeconfig \ --cert-dir=/etc/kubernetes/ssl \ --kubeconfig=/etc/kubernetes/kubelet.kubeconfig \ --config=/etc/kubernetes/kubelet.json \ --cni-conf-dir=/etc/cni/net.d \ --container-runtime=remote \ --container-runtime-endpoint=unix:///run/containerd/containerd.sock \ --network-plugin=cni \ --rotate-certificates \ --pod-infra-container-image=registry.aliyuncs.com/google_containers/pause:3.9 \ --root-dir=/etc/cni/net.d \ --alsologtostderr=true \ --logtostderr=false \ --log-dir=/var/log/kubernetes \ --v=2 Restart=on-failure RestartSec=5 [Install] WantedBy=multi-user.target EOF 2.2 同步文件到集群节点cp kubelet-bootstrap.kubeconfig /etc/kubernetes/ cp kubelet.json /etc/kubernetes/ cp kubelet.service /usr/lib/systemd/system/ for i in k8s-master02 k8s-master03 k8s-node01 k8s-node02;do scp kubelet-bootstrap.kubeconfig kubelet.json $i:/etc/kubernetes/;done for i in k8s-master02 k8s-master03 k8s-node01 k8s-node02;do scp ca.pem $i:/etc/kubernetes/ssl/;done for i in k8s-master02 k8s-master03 k8s-node01 k8s-node02;do scp kubelet.service $i:/usr/lib/systemd/system/;done 说明: kubelet.json中address需要修改为当前主机IP地址。 2.3 创建目录及启动服务mkdir -p /var/lib/kubelet mkdir -p /var/log/kubernetes systemctl daemon-reload systemctl enable --now kubelet systemctl status kubelet 报错[root@k8s-master01 k8s-work]# systemctl status kubelet -l ● kubelet.service - Kubernetes Kubelet Loaded: loaded (/usr/lib/systemd/system/kubelet.service; enabled; vendor preset: disabled) Active: activating (auto-restart) (Result: exit-code) since Tue 2023-11-21 21:20:18 CST; 4s ago Docs: https://github.com/kubernetes/kubernetes Process: 9376 ExecStart=/usr/local/bin/kubelet --bootstrap-kubeconfig=/etc/kubernetes/kubelet-bootstrap.kubeconfig --cert-dir=/etc/kubernetes/ssl --kubeconfig=/etc/kubernetes/kubelet.kubeconfig --config=/etc/kubernetes/kubelet.json --container-runtime-endpoint=unix:///run/containerd/containerd.sock --rotate-certificates --pod-infra-container-image=registry.aliyuncs.com/google_containers/pause:3.9 --root-dir=/etc/cni/net.d --v=2 (code=exited, status=1/FAILURE) Main PID: 9376 (code=exited, status=1/FAILURE) Nov 21 21:20:18 k8s-master01 kubelet[9376]: I1121 21:20:18.983936 9376 server.go:895] "Client rotation is on, will bootstrap in background" Nov 21 21:20:18 k8s-master01 kubelet[9376]: E1121 21:20:18.984353 9376 bootstrap.go:241] unable to read existing bootstrap client config from /etc/kubernetes/kubelet.kubeconfig: invalid configuration: [unable to read client-cert /etc/kubernetes/ssl/kubelet-client-current.pem for default-auth due to open /etc/kubernetes/ssl/kubelet-client-current.pem: no such file or directory, unable to read client-key /etc/kubernetes/ssl/kubelet-client-current.pem for default-auth due to open /etc/kubernetes/ssl/kubelet-client-current.pem: no such file or directory] Nov 21 21:20:18 k8s-master01 kubelet[9376]: I1121 21:20:18.985122 9376 bootstrap.go:101] "Use the bootstrap credentials to request a cert, and set kubeconfig to point to the certificate dir" Nov 21 21:20:18 k8s-master01 kubelet[9376]: I1121 21:20:18.985241 9376 server.go:952] "Starting client certificate rotation" Nov 21 21:20:18 k8s-master01 kubelet[9376]: I1121 21:20:18.985250 9376 certificate_manager.go:356] kubernetes.io/kube-apiserver-client-kubelet: Certificate rotation is enabled Nov 21 21:20:18 k8s-master01 kubelet[9376]: I1121 21:20:18.985472 9376 certificate_manager.go:356] kubernetes.io/kube-apiserver-client-kubelet: Rotating certificates Nov 21 21:20:18 k8s-master01 kubelet[9376]: I1121 21:20:18.985506 9376 dynamic_cafile_content.go:119] "Loaded a new CA Bundle and Verifier" name="client-ca-bundle::/etc/kubernetes/ssl/ca.pem" Nov 21 21:20:18 k8s-master01 systemd[1]: kubelet.service failed. Nov 21 21:20:18 k8s-master01 kubelet[9376]: I1121 21:20:18.985703 9376 dynamic_cafile_content.go:157] "Starting controller" name="client-ca-bundle::/etc/kubernetes/ssl/ca.pem" Nov 21 21:20:18 k8s-master01 kubelet[9376]: E1121 21:20:18.988960 9376 run.go:74] "command failed" err="failed to run Kubelet: validate service connection: validate CRI v1 runtime API for endpoint \"unix:///run/containerd/containerd.sock\": rpc error: code = Unimplemented desc = unknown service runtime.v1.RuntimeService" 报错关键点查看containerd信息root@k8s-master01 k8s-work]# journalctl -f -u containerd.service -- Logs begin at Tue 2023-11-21 18:23:41 CST. -- Nov 21 21:35:47 k8s-master01 containerd[11532]: time="2023-11-21T21:35:47.984785204+08:00" level=info msg="loading plugtainerd.grpc.v1.version\"..." type=io.containerd.grpc.v1 Nov 21 21:35:47 k8s-master01 containerd[11532]: time="2023-11-21T21:35:47.984794914+08:00" level=info msg="loading plugtainerd.grpc.v1.cri\"..." type=io.containerd.grpc.v1 Nov 21 21:35:47 k8s-master01 containerd[11532]: time="2023-11-21T21:35:47.984984614+08:00" level=warning msg="failed ton io.containerd.grpc.v1.cri" error="invalid plugin config: `systemd_cgroup` only works for runtime io.containerd.runtim Nov 21 21:35:47 k8s-master01 containerd[11532]: time="2023-11-21T21:35:47.984999254+08:00" level=info msg="loading plugtainerd.tracing.processor.v1.otlp\"..." type=io.containerd.tracing.processor.v1 Nov 21 21:35:47 k8s-master01 containerd[11532]: time="2023-11-21T21:35:47.985012723+08:00" level=info msg="skip loadingo.containerd.tracing.processor.v1.otlp\"..." error="no OpenTelemetry endpoint: skip plugin" type=io.containerd.tracing.1 Nov 21 21:35:47 k8s-master01 containerd[11532]: time="2023-11-21T21:35:47.985020034+08:00" level=info msg="loading plugtainerd.internal.v1.tracing\"..." type=io.containerd.internal.v1 Nov 21 21:35:47 k8s-master01 containerd[11532]: time="2023-11-21T21:35:47.985031233+08:00" level=info msg="skipping trasor initialization (no tracing plugin)" error="no OpenTelemetry endpoint: skip plugin" Nov 21 21:35:47 k8s-master01 containerd[11532]: time="2023-11-21T21:35:47.985226773+08:00" level=info msg=serving... adcontainerd/containerd.sock.ttrpc Nov 21 21:35:47 k8s-master01 containerd[11532]: time="2023-11-21T21:35:47.985249673+08:00" level=info msg=serving... adcontainerd/containerd.sock Nov 21 21:35:47 k8s-master01 containerd[11532]: time="2023-11-21T21:35:47.985291982+08:00" level=info msg="containerd s booted in 0.022170s" 提取关键报错time="2023-11-21T21:35:47.984984614+08:00" level=warning msg="failed ton io.containerd.grpc.v1.cri" error="invalid plugin config: `systemd_cgroup` only works for runtime io.containerd.runtim 结论测试了各种方法发现都不行 索性来个彻底的 有知道的童鞋告诉我下哈 感激不尽 mv /etc/containerd/config.toml /root/config.toml.bak systemctl restart containerd # kubectl get nodes NAME STATUS ROLES AGE VERSION k8s-master1 NotReady <none> 2m55s v1.21.10 k8s-master2 NotReady <none> 45s v1.21.10 k8s-master3 NotReady <none> 39s v1.21.10 k8s-worker1 NotReady <none> 5m1s v1.21.10 # kubectl get csr NAME AGE SIGNERNAME REQUESTOR CONDITION csr-b949p 7m55s kubernetes.io/kube-apiserver-client-kubelet kubelet-bootstrap Approved,Issued csr-c9hs4 3m34s kubernetes.io/kube-apiserver-client-kubelet kubelet-bootstrap Approved,Issued csr-r8vhp 5m50s kubernetes.io/kube-apiserver-client-kubelet kubelet-bootstrap Approved,Issued csr-zb4sr 3m40s kubernetes.io/kube-apiserver-client-kubelet kubelet-bootstrap Approved,Issued 说明: 确认kubelet服务启动成功后,接着到master上Approve一下bootstrap请求。 [root@k8s-master01 k8s-work]# kubectl get nodes NAME STATUS ROLES AGE VERSION k8s-master01 Ready <none> 62m v1.28.4 k8s-master02 Ready <none> 46m v1.28.4 k8s-master03 Ready <none> 5m51s v1.28.4 k8s-node01 Ready <none> 4m58s v1.28.4 k8s-node02 Ready <none> 2m33s v1.28.4
-
k8s 1.28高可用搭建 kube-proxy集群10 1 部署kube-proxy1.1 创建kube-proxy证书请求文件cat > kube-proxy-csr.json << "EOF" { "CN": "system:kube-proxy", "key": { "algo": "rsa", "size": 2048 }, "names": [ { "C": "CN", "ST": "Beijing", "L": "Beijing", "O": "kubemsb", "OU": "CN" } ] } EOF 1.2 生成证书cfssl gencert -ca=ca.pem -ca-key=ca-key.pem -config=ca-config.json -profile=kubernetes kube-proxy-csr.json | cfssljson -bare kube-proxy # ls kube-proxy* kube-proxy.csr kube-proxy-csr.json kube-proxy-key.pem kube-proxy.pem 1.3 创建kubeconfig文件kubectl config set-cluster kubernetes --certificate-authority=ca.pem --embed-certs=true --server=https://192.168.31.100:6443 --kubeconfig=kube-proxy.kubeconfig kubectl config set-credentials kube-proxy --client-certificate=kube-proxy.pem --client-key=kube-proxy-key.pem --embed-certs=true --kubeconfig=kube-proxy.kubeconfig kubectl config set-context default --cluster=kubernetes --user=kube-proxy --kubeconfig=kube-proxy.kubeconfig kubectl config use-context default --kubeconfig=kube-proxy.kubeconfig 1.4 创建服务配置文件cat > kube-proxy.yaml << "EOF" apiVersion: kubeproxy.config.k8s.io/v1alpha1 bindAddress: 192.168.31.32 clientConnection: kubeconfig: /etc/kubernetes/kube-proxy.kubeconfig clusterCIDR: 10.244.0.0/16 healthzBindAddress: 192.168.31.32:10256 kind: KubeProxyConfiguration metricsBindAddress: 192.168.31.32:10249 mode: "ipvs" EOF 1.5 创建服务启动管理文件cat > kube-proxy.service << "EOF" [Unit] Description=Kubernetes Kube-Proxy Server Documentation=https://github.com/kubernetes/kubernetes After=network.target [Service] WorkingDirectory=/var/lib/kube-proxy ExecStart=/usr/local/bin/kube-proxy \ --config=/etc/kubernetes/kube-proxy.yaml \ --alsologtostderr=true \ --logtostderr=false \ --log-dir=/var/log/kubernetes \ --v=2 Restart=on-failure RestartSec=5 LimitNOFILE=65536 [Install] WantedBy=multi-user.target EOF 1.6 同步文件到集群工作节点主机cp kubernetes/server/bin/kube-proxy /usr/local/bin/ cp kube-proxy*.pem /etc/kubernetes/ssl/ cp kube-proxy.kubeconfig kube-proxy.yaml /etc/kubernetes/ cp kube-proxy.service /usr/lib/systemd/system/ for i in k8s-master02 k8s-master03 k8s-node01 k8s-node02;do scp kubernetes/server/bin/kube-proxy $i:/usr/local/bin/;done for i in k8s-master02 k8s-master03 k8s-node01 k8s-node02;do scp kube-proxy*.pem $i:/etc/kubernetes/ssl;done for i in k8s-master02 k8s-master03 k8s-node01 k8s-node02;do scp kube-proxy.kubeconfig kube-proxy.yaml $i:/etc/kubernetes/;done for i in k8s-master02 k8s-master03 k8s-node01 k8s-node02;do scp kube-proxy.service $i:/usr/lib/systemd/system/;done 说明: 修改kube-proxy.yaml中IP地址为当前主机IP. 1.7 服务启动mkdir -p /var/lib/kube-proxy systemctl daemon-reload systemctl enable --now kube-proxy systemctl status kube-proxy
-
k8s 1.28高可用搭建Calico集群11 1 网络组件部署 Calico1.1 下载 https://docs.tigera.io/calico/latest/getting-started/kubernetes/self-managed-onprem/onpremises kubectl create -f https://raw.githubusercontent.com/projectcalico/calico/v3.26.4/manifests/tigera-operator.yaml curl https://raw.githubusercontent.com/projectcalico/calico/v3.26.4/manifests/custom-resources.yaml -O 1.2 修改文件# This section includes base Calico installation configuration. # For more information, see: https://projectcalico.docs.tigera.io/master/reference/installation/api#operator.tigera.io/v1.Installation apiVersion: operator.tigera.io/v1 kind: Installation metadata: name: default spec: # Configures Calico networking. calicoNetwork: # Note: The ipPools section cannot be modified post-install. ipPools: - blockSize: 26 cidr: 10.244.0.0/16 encapsulation: VXLANCrossSubnet natOutgoing: Enabled nodeSelector: all() --- # This section configures the Calico API server. # For more information, see: https://projectcalico.docs.tigera.io/master/reference/installation/api#operator.tigera.io/v1.APIServer apiVersion: operator.tigera.io/v1 kind: APIServer metadata: name: default spec: {} 1.3 应用文件mkdir -p /var/lib/kubelet/plugins_registry kubectl apply -f custom-resources.yaml 1.4 验证应用结果[root@k8s-master01 k8s-work]# kubectl get pods -A -w NAMESPACE NAME READY STATUS RESTARTS AGE calico-apiserver calico-apiserver-86cf84fd44-lgq4f 1/1 Running 0 2m58s calico-apiserver calico-apiserver-86cf84fd44-r9z9x 1/1 Running 0 2m57s calico-system calico-kube-controllers-5464c5f856-9wc27 1/1 Running 0 25m calico-system calico-node-2rc2k 1/1 Running 0 25m calico-system calico-node-jn49m 1/1 Running 0 25m calico-system calico-node-qh9cn 1/1 Running 0 25m calico-system calico-node-x8ws2 1/1 Running 0 25m calico-system calico-node-zdnfb 1/1 Running 0 25m calico-system calico-typha-56f47497f9-pf9qg 1/1 Running 0 25m calico-system calico-typha-56f47497f9-wsbz9 1/1 Running 0 25m calico-system calico-typha-56f47497f9-x48r5 1/1 Running 0 25m calico-system csi-node-driver-7dz9r 2/2 Running 0 25m calico-system csi-node-driver-g9wl9 2/2 Running 0 25m calico-system csi-node-driver-hr7d8 2/2 Running 0 25m calico-system csi-node-driver-lrqb9 2/2 Running 0 25m calico-system csi-node-driver-z76d9 2/2 Running 0 25m tigera-operator tigera-operator-7f8cd97876-gn9fb 1/1 Running 0 52m [root@k8s-master01 k8s-work]# kubectl get nodes NAME STATUS ROLES AGE VERSION k8s-master01 Ready <none> 25h v1.28.4 k8s-master02 Ready <none> 25h v1.28.4 k8s-master03 Ready <none> 24h v1.28.4 k8s-node01 Ready <none> 24h v1.28.4 k8s-node02 Ready <none> 24h v1.28.4
-
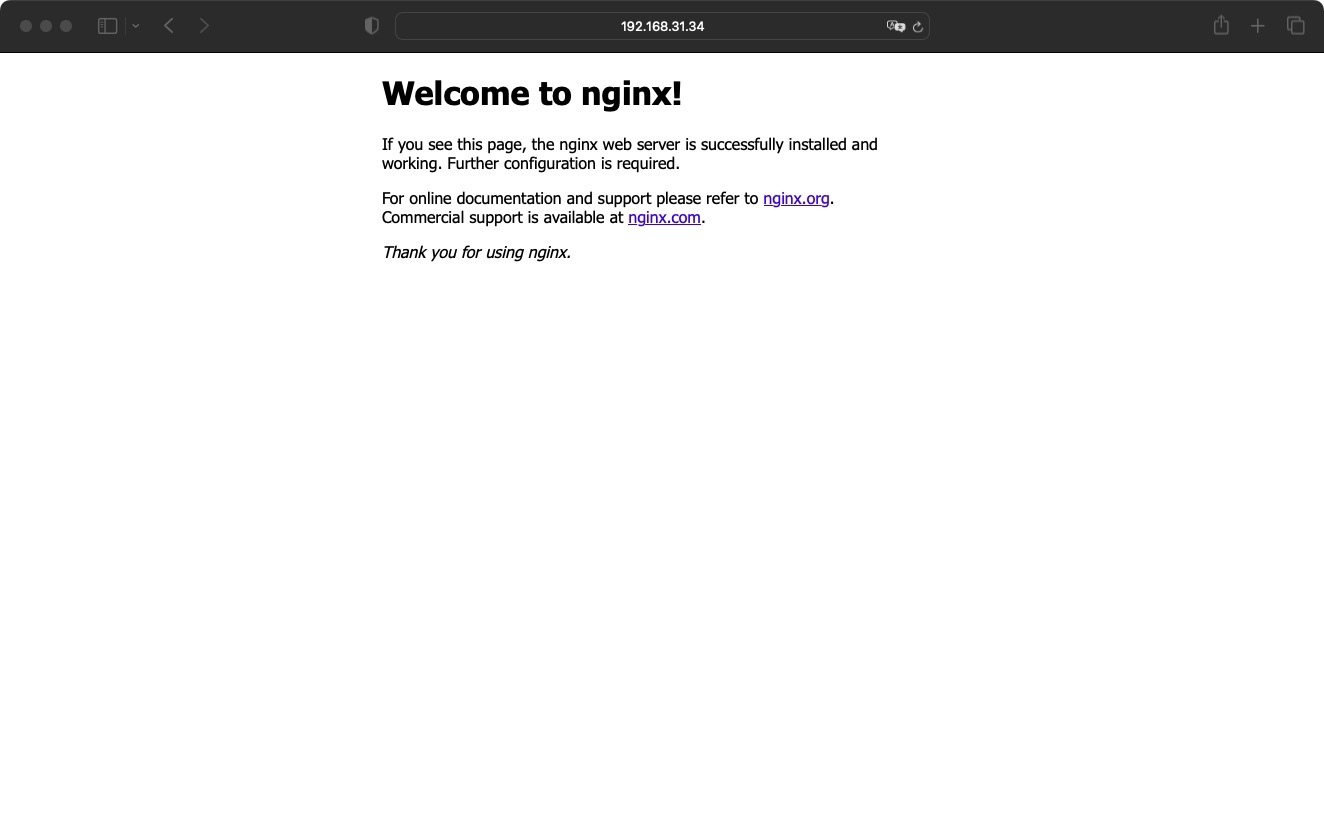
k8s 1.28高可用搭建CoreDns集群12 1 部署CoreDNScat > coredns.yaml << "EOF" apiVersion: v1 kind: ServiceAccount metadata: name: coredns namespace: kube-system --- apiVersion: rbac.authorization.k8s.io/v1 kind: ClusterRole metadata: labels: kubernetes.io/bootstrapping: rbac-defaults name: system:coredns rules: - apiGroups: - "" resources: - endpoints - services - pods - namespaces verbs: - list - watch - apiGroups: - discovery.k8s.io resources: - endpointslices verbs: - list - watch --- apiVersion: rbac.authorization.k8s.io/v1 kind: ClusterRoleBinding metadata: annotations: rbac.authorization.kubernetes.io/autoupdate: "true" labels: kubernetes.io/bootstrapping: rbac-defaults name: system:coredns roleRef: apiGroup: rbac.authorization.k8s.io kind: ClusterRole name: system:coredns subjects: - kind: ServiceAccount name: coredns namespace: kube-system --- apiVersion: v1 kind: ConfigMap metadata: name: coredns namespace: kube-system data: Corefile: | .:53 { errors health { lameduck 5s } ready kubernetes cluster.local in-addr.arpa ip6.arpa { fallthrough in-addr.arpa ip6.arpa } prometheus :9153 forward . /etc/resolv.conf { max_concurrent 1000 } cache 30 loop reload loadbalance } --- apiVersion: apps/v1 kind: Deployment metadata: name: coredns namespace: kube-system labels: k8s-app: kube-dns kubernetes.io/name: "CoreDNS" spec: # replicas: not specified here: # 1. Default is 1. # 2. Will be tuned in real time if DNS horizontal auto-scaling is turned on. strategy: type: RollingUpdate rollingUpdate: maxUnavailable: 1 selector: matchLabels: k8s-app: kube-dns template: metadata: labels: k8s-app: kube-dns spec: priorityClassName: system-cluster-critical serviceAccountName: coredns tolerations: - key: "CriticalAddonsOnly" operator: "Exists" nodeSelector: kubernetes.io/os: linux affinity: podAntiAffinity: preferredDuringSchedulingIgnoredDuringExecution: - weight: 100 podAffinityTerm: labelSelector: matchExpressions: - key: k8s-app operator: In values: ["kube-dns"] topologyKey: kubernetes.io/hostname containers: - name: coredns image: coredns/coredns:1.11.1 imagePullPolicy: IfNotPresent resources: limits: memory: 170Mi requests: cpu: 100m memory: 70Mi args: [ "-conf", "/etc/coredns/Corefile" ] volumeMounts: - name: config-volume mountPath: /etc/coredns readOnly: true ports: - containerPort: 53 name: dns protocol: UDP - containerPort: 53 name: dns-tcp protocol: TCP - containerPort: 9153 name: metrics protocol: TCP securityContext: allowPrivilegeEscalation: false capabilities: add: - NET_BIND_SERVICE drop: - all readOnlyRootFilesystem: true livenessProbe: httpGet: path: /health port: 8080 scheme: HTTP initialDelaySeconds: 60 timeoutSeconds: 5 successThreshold: 1 failureThreshold: 5 readinessProbe: httpGet: path: /ready port: 8181 scheme: HTTP dnsPolicy: Default volumes: - name: config-volume configMap: name: coredns items: - key: Corefile path: Corefile --- apiVersion: v1 kind: Service metadata: name: kube-dns namespace: kube-system annotations: prometheus.io/port: "9153" prometheus.io/scrape: "true" labels: k8s-app: kube-dns kubernetes.io/cluster-service: "true" kubernetes.io/name: "CoreDNS" spec: selector: k8s-app: kube-dns clusterIP: 10.96.0.2 ports: - name: dns port: 53 protocol: UDP - name: dns-tcp port: 53 protocol: TCP - name: metrics port: 9153 protocol: TCP EOF kubectl apply -f coredns.yaml # kubectl get pods -A NAMESPACE NAME READY STATUS RESTARTS AGE kube-system calico-kube-controllers-7cc8dd57d9-tf2m5 1/1 Running 0 4m7s kube-system calico-node-llw5w 1/1 Running 0 4m7s kube-system calico-node-mhh6g 1/1 Running 0 4m7s kube-system calico-node-twj99 1/1 Running 0 4m7s kube-system calico-node-zh6xl 1/1 Running 0 4m7s kube-system coredns-675db8b7cc-ncnf6 1/1 Running 0 26s 2.5.11 部署应用验证cat > nginx.yaml << "EOF" --- apiVersion: v1 kind: ReplicationController metadata: name: nginx-web spec: replicas: 2 selector: name: nginx template: metadata: labels: name: nginx spec: containers: - name: nginx image: nginx:1.19.6 ports: - containerPort: 80 --- apiVersion: v1 kind: Service metadata: name: nginx-service-nodeport spec: ports: - port: 80 targetPort: 80 nodePort: 30001 protocol: TCP type: NodePort selector: name: nginx EOF kubectl apply -f nginx.yaml [root@k8s-master01 k8s-work]# kubectl get pods -A -w -o wide NAMESPACE NAME READY STATUS RESTARTS AGE IP NODE NOMINATED NODE READINESS GATES calico-apiserver calico-apiserver-86cf84fd44-lgq4f 1/1 Running 0 7m31s 10.244.58.193 k8s-node02 <none> <none> calico-apiserver calico-apiserver-86cf84fd44-r9z9x 1/1 Running 0 7m30s 10.244.195.1 k8s-master03 <none> <none> calico-system calico-kube-controllers-5464c5f856-9wc27 1/1 Running 0 30m 10.88.0.2 k8s-master03 <none> <none> calico-system calico-node-2rc2k 1/1 Running 0 30m 192.168.31.34 k8s-master01 <none> <none> calico-system calico-node-jn49m 1/1 Running 0 30m 192.168.31.38 k8s-node02 <none> <none> calico-system calico-node-qh9cn 1/1 Running 0 30m 192.168.31.37 k8s-node01 <none> <none> calico-system calico-node-x8ws2 1/1 Running 0 30m 192.168.31.36 k8s-master03 <none> <none> calico-system calico-node-zdnfb 1/1 Running 0 30m 192.168.31.35 k8s-master02 <none> <none> calico-system calico-typha-56f47497f9-pf9qg 1/1 Running 0 30m 192.168.31.34 k8s-master01 <none> <none> calico-system calico-typha-56f47497f9-wsbz9 1/1 Running 0 30m 192.168.31.35 k8s-master02 <none> <none> calico-system calico-typha-56f47497f9-x48r5 1/1 Running 0 30m 192.168.31.38 k8s-node02 <none> <none> calico-system csi-node-driver-7dz9r 2/2 Running 0 30m 10.244.58.194 k8s-node02 <none> <none> calico-system csi-node-driver-g9wl9 2/2 Running 0 30m 10.244.195.2 k8s-master03 <none> <none> calico-system csi-node-driver-hr7d8 2/2 Running 0 30m 10.244.32.129 k8s-master01 <none> <none> calico-system csi-node-driver-lrqb9 2/2 Running 0 30m 10.244.122.129 k8s-master02 <none> <none> calico-system csi-node-driver-z76d9 2/2 Running 0 30m 10.244.85.193 k8s-node01 <none> <none> default nginx-web-2qzth 1/1 Running 0 46s 10.244.32.131 k8s-master01 <none> <none> default nginx-web-v6srq 1/1 Running 0 46s 10.244.85.194 k8s-node01 <none> <none> kube-system coredns-7dbfc4968f-lsrfl 1/1 Running 0 2m9s 10.244.32.130 k8s-master01 <none> <none> kube-system coredns-7dbfc4968f-xsx78 1/1 Running 0 3m36s 10.244.122.130 k8s-master02 <none> <none> tigera-operator tigera-operator-7f8cd97876-gn9fb 1/1 Running 0 56m 192.168.31.37 k8s-node01 <none> <none> [root@k8s-master01 k8s-work]# kubectl get all NAME READY STATUS RESTARTS AGE pod/nginx-web-2qzth 1/1 Running 0 68s pod/nginx-web-v6srq 1/1 Running 0 68s NAME DESIRED CURRENT READY AGE replicationcontroller/nginx-web 2 2 2 68s NAME TYPE CLUSTER-IP EXTERNAL-IP PORT(S) AGE service/kubernetes ClusterIP 10.96.0.1 <none> 443/TCP 3d3h service/nginx-service-nodeport NodePort 10.96.65.129 <none> 80:30001/TCP 68s svc 验证[root@k8s-master01 k8s-work]# kubectl get svc NAME TYPE CLUSTER-IP EXTERNAL-IP PORT(S) AGE kubernetes ClusterIP 10.96.0.1 <none> 443/TCP 3d3h nginx-service-nodeport NodePort 10.96.65.129 <none> 80:30001/TCP 2m5s [root@k8s-master01 k8s-work]# curl 10.96.65.129 <!DOCTYPE html> <html> <head> <title>Welcome to nginx!</title> <style> body { width: 35em; margin: 0 auto; font-family: Tahoma, Verdana, Arial, sans-serif; } </style> </head> <body> <h1>Welcome to nginx!</h1> <p>If you see this page, the nginx web server is successfully installed and working. Further configuration is required.</p> <p>For online documentation and support please refer to <a href="http://nginx.org/">nginx.org</a>.<br/> Commercial support is available at <a href="http://nginx.com/">nginx.com</a>.</p> <p><em>Thank you for using nginx.</em></p> </body> </html> 浏览器验证
-
k8s 1.28高可用搭建kube-scheduler集群07 1 创建kube-scheduler证书请求文件cat > kube-scheduler-csr.json << "EOF" { "CN": "system:kube-scheduler", "hosts": [ "127.0.0.1", "192.168.31.34", "192.168.31.35", "192.168.31.36" ], "key": { "algo": "rsa", "size": 2048 }, "names": [ { "C": "CN", "ST": "Beijing", "L": "Beijing", "O": "system:kube-scheduler", "OU": "system" } ] } EOF 2.5.8.2 生成kube-scheduler证书cfssl gencert -ca=ca.pem -ca-key=ca-key.pem -config=ca-config.json -profile=kubernetes kube-scheduler-csr.json | cfssljson -bare kube-scheduler # ls kube-scheduler.csr kube-scheduler-csr.json kube-scheduler-key.pem kube-scheduler.pem 2.5.8.3 创建kube-scheduler的kubeconfigkubectl config set-cluster kubernetes --certificate-authority=ca.pem --embed-certs=true --server=https://192.168.31.100:6443 --kubeconfig=kube-scheduler.kubeconfig kubectl config set-credentials system:kube-scheduler --client-certificate=kube-scheduler.pem --client-key=kube-scheduler-key.pem --embed-certs=true --kubeconfig=kube-scheduler.kubeconfig kubectl config set-context system:kube-scheduler --cluster=kubernetes --user=system:kube-scheduler --kubeconfig=kube-scheduler.kubeconfig kubectl config use-context system:kube-scheduler --kubeconfig=kube-scheduler.kubeconfig 2.5.8.4 创建服务配置文件cat > kube-scheduler.conf << "EOF" KUBE_SCHEDULER_OPTS="--bind-address=127.0.0.1 \ --kubeconfig=/etc/kubernetes/kube-scheduler.kubeconfig \ --leader-elect=true \ --v=2" EOF 2.5.8.5创建服务启动配置文件cat > kube-scheduler.service << "EOF" [Unit] Description=Kubernetes Scheduler Documentation=https://github.com/kubernetes/kubernetes [Service] EnvironmentFile=-/etc/kubernetes/kube-scheduler.conf ExecStart=/usr/local/bin/kube-scheduler $KUBE_SCHEDULER_OPTS Restart=on-failure RestartSec=5 [Install] WantedBy=multi-user.target EOF 2.5.8.6 同步文件至集群master节点cp kube-scheduler*.pem /etc/kubernetes/ssl/ cp kube-scheduler.kubeconfig /etc/kubernetes/ cp kube-scheduler.conf /etc/kubernetes/ cp kube-scheduler.service /usr/lib/systemd/system/ scp kube-scheduler*.pem k8s-master02:/etc/kubernetes/ssl/ scp kube-scheduler*.pem k8s-master03:/etc/kubernetes/ssl/ scp kube-scheduler.kubeconfig kube-scheduler.conf k8s-master02:/etc/kubernetes/ scp kube-scheduler.kubeconfig kube-scheduler.conf k8s-master03:/etc/kubernetes/ scp kube-scheduler.service k8s-master02:/usr/lib/systemd/system/ scp kube-scheduler.service k8s-master03:/usr/lib/systemd/system/ 2.5.8.7 启动服务systemctl daemon-reload systemctl enable --now kube-scheduler systemctl status kube-scheduler
-
k8s 1.28高可用搭建etcd集群03 在k8s-master01上操作 1. 创建工作目录mkdir -p /data/k8s-work 2. 获取cfssl工具cd /data/k8s-work wget --no-check-certificate https://pkg.cfssl.org/R1.2/cfssl_linux-amd64 wget --no-check-certificate https://pkg.cfssl.org/R1.2/cfssljson_linux-amd64 wget --no-check-certificate https://pkg.cfssl.org/R1.2/cfssl-certinfo_linux-amd64 如果下载失败可以单独加群联系 说明: cfssl是使用go编写,由CloudFlare开源的一款PKI/TLS工具。主要程序有: - cfssl,是CFSSL的命令行工具 - cfssljson用来从cfssl程序获取JSON输出,并将证书,密钥,CSR和bundle写入文件中。 chmod +x cfssl* mv cfssl_linux-amd64 /usr/local/bin/cfssl mv cfssljson_linux-amd64 /usr/local/bin/cfssljson mv cfssl-certinfo_linux-amd64 /usr/local/bin/cfssl-certinfo # cfssl version Version: 1.2.0 Revision: dev Runtime: go1.6 3. 创建CA证书3.1 配置ca证书请求文件cat > ca-csr.json <<EOF { "CN": "kubernetes", "key": { "algo": "rsa", "size": 2048 }, "names": [ { "C": "CN", "ST": "Beijing", "L": "Beijing", "O": "kubemsb", "OU": "CN" } ], "ca": { "expiry": "876000h" } } EOF 3.2 创建ca证书cfssl gencert -initca ca-csr.json | cfssljson -bare ca 3.3 配置ca证书策略cfssl print-defaults config > ca-config.json cat > ca-config.json <<"EOF" { "signing": { "default": { "expiry": "876000h" }, "profiles": { "kubernetes": { "usages": [ "signing", "key encipherment", "server auth", "client auth" ], "expiry": "876000h" } } } } EOF server auth 表示client可以对使用该ca对server提供的证书进行验证 client auth 表示server可以使用该ca对client提供的证书进行验证 4 创建etcd证书4.1 配置etcd请求文件cat > etcd-csr.json <<EOF { "CN": "etcd", "hosts": [ "127.0.0.1", "192.168.31.34", "192.168.31.35", "192.168.31.36" ], "key": { "algo": "rsa", "size": 2048 }, "names": [{ "C": "CN", "ST": "Beijing", "L": "Beijing", "O": "kubemsb", "OU": "CN" }] } EOF 4.2 生成etcd证书cfssl gencert -ca=ca.pem -ca-key=ca-key.pem -config=ca-config.json -profile=kubernetes etcd-csr.json | cfssljson -bare etcd # ls 输出 ca-config.json ca.csr ca-csr.json ca-key.pem ca.pem etcd.csr etcd-csr.json etcd-key.pem etcd.pem 5 部署etcd集群5.1 下载etcd软件包wget https://github.com/etcd-io/etcd/releases/download/v3.5.10/etcd-v3.5.10-linux-amd64.tar.gz 如果下载失败可以单独加群联系 5.2 安装etcd软件tar -xvf etcd-v3.5.10-linux-amd64.tar.gz cp -p etcd-v3.5.10-linux-amd64/etcd* /usr/local/bin/ 5.3 分发etcd软件scp etcd-v3.5.10-linux-amd64/etcd* k8s-master02:/usr/local/bin/ scp etcd-v3.5.10-linux-amd64/etcd* k8s-master03:/usr/local/bin/ 5.4 创建配置文件mkdir /etc/etcd cat > /etc/etcd/etcd.conf <<EOF #[Member] ETCD_NAME="etcd1" ETCD_DATA_DIR="/var/lib/etcd/default.etcd" ETCD_LISTEN_PEER_URLS="https://192.168.31.34:2380" ETCD_LISTEN_CLIENT_URLS="https://192.168.31.34:2379,http://127.0.0.1:2379" #[Clustering] ETCD_INITIAL_ADVERTISE_PEER_URLS="https://192.168.31.34:2380" ETCD_ADVERTISE_CLIENT_URLS="https://192.168.31.34:2379" ETCD_INITIAL_CLUSTER="etcd1=https://192.168.31.34:2380,etcd2=https://192.168.31.35:2380,etcd3=https://192.168.31.36:2380" ETCD_INITIAL_CLUSTER_TOKEN="etcd-cluster" ETCD_INITIAL_CLUSTER_STATE="new" EOF 说明: ETCD_NAME:节点名称,集群中唯一 ETCD_DATA_DIR:数据目录 ETCD_LISTEN_PEER_URLS:集群通信监听地址 ETCD_LISTEN_CLIENT_URLS:客户端访问监听地址 ETCD_INITIAL_ADVERTISE_PEER_URLS:集群通告地址 ETCD_ADVERTISE_CLIENT_URLS:客户端通告地址 ETCD_INITIAL_CLUSTER:集群节点地址 ETCD_INITIAL_CLUSTER_TOKEN:集群Token ETCD_INITIAL_CLUSTER_STATE:加入集群的当前状态,new是新集群,existing表示加入已有集群 5.5 创建服务配置文件mkdir -p /etc/etcd/ssl mkdir -p /var/lib/etcd/default.etcd cd /data/k8s-work cp ca*.pem /etc/etcd/ssl cp etcd*.pem /etc/etcd/ssl cat > /etc/systemd/system/etcd.service <<EOF [Unit] Description=Etcd Server After=network.target After=network-online.target Wants=network-online.target [Service] Type=notify EnvironmentFile=-/etc/etcd/etcd.conf WorkingDirectory=/var/lib/etcd/ ExecStart=/usr/local/bin/etcd \ --cert-file=/etc/etcd/ssl/etcd.pem \ --key-file=/etc/etcd/ssl/etcd-key.pem \ --trusted-ca-file=/etc/etcd/ssl/ca.pem \ --peer-cert-file=/etc/etcd/ssl/etcd.pem \ --peer-key-file=/etc/etcd/ssl/etcd-key.pem \ --peer-trusted-ca-file=/etc/etcd/ssl/ca.pem \ --peer-client-cert-auth \ --client-cert-auth Restart=on-failure RestartSec=5 LimitNOFILE=65536 [Install] WantedBy=multi-user.target EOF 5.6 同步etcd配置到集群其它master节点创建目录 mkdir -p /etc/etcd mkdir -p /etc/etcd/ssl mkdir -p /var/lib/etcd/default.etcd 服务配置文件,需要修改etcd节点名称及IP地址 for i in k8s-master02 k8s-master03 \ do \ scp /etc/etcd/etcd.conf $i:/etc/etcd/ \ done k8s-master02: cat > /etc/etcd/etcd.conf <<EOF #[Member] ETCD_NAME="etcd2" ETCD_DATA_DIR="/var/lib/etcd/default.etcd" ETCD_LISTEN_PEER_URLS="https://192.168.31.35:2380" ETCD_LISTEN_CLIENT_URLS="https://192.168.31.35:2379,http://127.0.0.1:2379" #[Clustering] ETCD_INITIAL_ADVERTISE_PEER_URLS="https://192.168.31.35:2380" ETCD_ADVERTISE_CLIENT_URLS="https://192.168.31.35:2379" ETCD_INITIAL_CLUSTER="etcd1=https://192.168.31.34:2380,etcd2=https://192.168.31.35:2380,etcd3=https://192.168.31.36:2380" ETCD_INITIAL_CLUSTER_TOKEN="etcd-cluster" ETCD_INITIAL_CLUSTER_STATE="new" EOF k8s-master03: cat > /etc/etcd/etcd.conf<<EOF #[Member] ETCD_NAME="etcd3" ETCD_DATA_DIR="/var/lib/etcd/default.etcd" ETCD_LISTEN_PEER_URLS="https://192.168.31.36:2380" ETCD_LISTEN_CLIENT_URLS="https://192.168.31.36:2379,http://127.0.0.1:2379" #[Clustering] ETCD_INITIAL_ADVERTISE_PEER_URLS="https://192.168.31.36:2380" ETCD_ADVERTISE_CLIENT_URLS="https://192.168.31.36:2379" ETCD_INITIAL_CLUSTER="etcd1=https://192.168.31.34:2380,etcd2=https://192.168.31.35:2380,etcd3=https://192.168.31.36:2380" ETCD_INITIAL_CLUSTER_TOKEN="etcd-cluster" ETCD_INITIAL_CLUSTER_STATE="new" EOF 证书文件 for i in k8s-master02 k8s-master03 \ do \ scp /etc/etcd/ssl/* $i:/etc/etcd/ssl \ done 服务启动配置文件 for i in k8s-master02 k8s-master03 \ do \ scp /etc/systemd/system/etcd.service $i:/etc/systemd/system/ \ done 5.7 启动etcd集群systemctl daemon-reload systemctl enable --now etcd.service systemctl status etcd 5.8 验证集群状态ETCDCTL_API=3 /usr/local/bin/etcdctl --write-out=table --cacert=/etc/etcd/ssl/ca.pem --cert=/etc/etcd/ssl/etcd.pem --key=/etc/etcd/ssl/etcd-key.pem --endpoints=https://192.168.31.34:2379,https://192.168.31.35:2379,https://192.168.31.36:2379 endpoint health +----------------------------+--------+-------------+-------+ | ENDPOINT | HEALTH | TOOK | ERROR | +----------------------------+--------+-------------+-------+ | https://192.168.31.34:2379 | true | 10.393062ms | | | https://192.168.31.35:2379 | true | 15.70437ms | | | https://192.168.31.36:2379 | true | 15.871684ms | | +----------------------------+--------+-------------+-------+ 检查ETCD数据库性能 ETCDCTL_API=3 /usr/local/bin/etcdctl --write-out=table --cacert=/etc/etcd/ssl/ca.pem --cert=/etc/etcd/ssl/etcd.pem --key=/etc/etcd/ssl/etcd-key.pem --endpoints=https://192.168.31.34:2379,https://192.168.31.35:2379,https://192.168.31.36:2379 check perf [root@k8s-master01 k8s-work]# ETCDCTL_API=3 /usr/local/bin/etcdctl --write-out=table --cacert=/etc/etcd/ssl/ca.pem --cert=/etc/etcd/ssl/etcd.pem --key=/etc/etcd/ssl/etcd-key.pem --endpoints=https://192.168.31.34:2379,https://192.168.31.35:2379,https://192.168.31.36:2379 check perf 59 / 60 Booooooooooooooooooooooooooooooooooooooooooooooooooooooooooooooooooooooooooooooooooooooooooooooooooooooooooooooooooooooooooooooom ! 98.33%PASS: Throughput is 151 writes/s PASS: Slowest request took 0.011820s PASS: Stddev is 0.000712s PASS ETCDCTL_API=3 /usr/local/bin/etcdctl --write-out=table --cacert=/etc/etcd/ssl/ca.pem --cert=/etc/etcd/ssl/etcd.pem --key=/etc/etcd/ssl/etcd-key.pem --endpoints=https://192.168.31.34:2379,https://192.168.31.35:2379,https://192.168.31.36:2379 member list +------------------+---------+-------+----------------------------+----------------------------+------------+ | ID | STATUS | NAME | PEER ADDRS | CLIENT ADDRS | IS LEARNER | +------------------+---------+-------+----------------------------+----------------------------+------------+ | 571a14daac64a5f | started | etcd3 | https://192.168.31.36:2380 | https://192.168.31.36:2379 | false | | c1975c3c20f6f75b | started | etcd1 | https://192.168.31.34:2380 | https://192.168.31.34:2379 | false | | fed2d7ddda540f99 | started | etcd2 | https://192.168.31.35:2380 | https://192.168.31.35:2379 | false | +------------------+---------+-------+----------------------------+----------------------------+------------+ ETCDCTL_API=3 /usr/local/bin/etcdctl --write-out=table --cacert=/etc/etcd/ssl/ca.pem --cert=/etc/etcd/ssl/etcd.pem --key=/etc/etcd/ssl/etcd-key.pem --endpoints=https://192.168.31.34:2379,https://192.168.31.35:2379,https://192.168.31.36:2379 endpoint status +----------------------------+------------------+---------+---------+-----------+------------+-----------+------------+--------------------+--------+ | ENDPOINT | ID | VERSION | DB SIZE | IS LEADER | IS LEARNER | RAFT TERM | RAFT INDEX | RAFT APPLIED INDEX | ERRORS | +----------------------------+------------------+---------+---------+-----------+------------+-----------+------------+--------------------+--------+ | https://192.168.31.34:2379 | c1975c3c20f6f75b | 3.5.10 | 22 MB | true | false | 2 | 9010 | 9010 | | | https://192.168.31.35:2379 | fed2d7ddda540f99 | 3.5.10 | 22 MB | false | false | 2 | 9010 | 9010 | | | https://192.168.31.36:2379 | 571a14daac64a5f | 3.5.10 | 22 MB | false | false | 2 | 9010 | 9010 | | +----------------------------+------------------+---------+---------+-----------+------------+-----------+------------+--------------------+--------+
-
k8s 1.28高可用搭建apiserver集群04 1 Kubernetes集群部署1.1 Kubernetes软件包下载wget --no-check-certificate https://dl.k8s.io/v1.28.4/kubernetes-server-linux-amd64.tar.gz 如果下载失败可以单独加群联系 1.2 Kubernetes软件包安装tar -xvf kubernetes-server-linux-amd64.tar.gz cd kubernetes/server/bin/ [root@k8s-master01 bin]# ll total 1147568 -rwxr-xr-x 1 root root 61353984 Nov 16 01:16 apiextensions-apiserver -rwxr-xr-x 1 root root 49102848 Nov 16 01:16 kubeadm -rwxr-xr-x 1 root root 58933248 Nov 16 01:16 kube-aggregator -rwxr-xr-x 1 root root 121745408 Nov 16 01:16 kube-apiserver -rw-r--r-- 1 root root 8 Nov 16 01:16 kube-apiserver.docker_tag -rw------- 1 root root 127259136 Nov 16 01:16 kube-apiserver.tar -rwxr-xr-x 1 root root 117780480 Nov 16 01:16 kube-controller-manager -rw-r--r-- 1 root root 8 Nov 16 01:16 kube-controller-manager.docker_tag -rw------- 1 root root 123293696 Nov 16 01:16 kube-controller-manager.tar -rwxr-xr-x 1 root root 49885184 Nov 16 01:16 kubectl -rwxr-xr-x 1 root root 48828416 Nov 16 01:16 kubectl-convert -rw-r--r-- 1 root root 8 Nov 16 01:16 kubectl.docker_tag -rw------- 1 root root 55398400 Nov 16 01:16 kubectl.tar -rwxr-xr-x 1 root root 110850048 Nov 16 01:16 kubelet -rwxr-xr-x 1 root root 1605632 Nov 16 01:16 kube-log-runner -rwxr-xr-x 1 root root 55107584 Nov 16 01:16 kube-proxy -rw-r--r-- 1 root root 8 Nov 16 01:16 kube-proxy.docker_tag -rw------- 1 root root 74757120 Nov 16 01:16 kube-proxy.tar -rwxr-xr-x 1 root root 56070144 Nov 16 01:16 kube-scheduler -rw-r--r-- 1 root root 8 Nov 16 01:16 kube-scheduler.docker_tag -rw------- 1 root root 61583360 Nov 16 01:16 kube-scheduler.tar -rwxr-xr-x 1 root root 1527808 Nov 16 01:16 mounter [root@k8s-master01 bin]# pwd /data/k8s-work/kubernetes/server/bin cp -p kube-apiserver kube-controller-manager kube-scheduler kubectl /usr/local/bin/ 1.3 Kubernetes软件分发scp -rp kube-apiserver kube-controller-manager kube-scheduler kubectl k8s-master02:/usr/local/bin/ scp -rp kube-apiserver kube-controller-manager kube-scheduler kubectl k8s-master03:/usr/local/bin/ scp -rp kubelet kube-proxy k8s-node01:/usr/local/bin scp -rp kubelet kube-proxy k8s-node02:/usr/local/bin 1.4 在集群节点上创建目录所有节点mkdir -p /etc/kubernetes/ mkdir -p /etc/kubernetes/ssl mkdir -p /var/log/kubernetes 2 部署api-server2.1 创建apiserver证书请求文件cd /data/k8s-work/ cat > kube-apiserver-csr.json << EOF { "CN": "kubernetes", "hosts": [ "127.0.0.1", "192.168.31.32", "192.168.31.33", "192.168.31.34", "192.168.31.35", "192.168.31.36", "192.168.31.37", "192.168.31.38", "192.168.31.39", "192.168.31.40", "192.168.31.100", "10.96.0.1", "kubernetes", "kubernetes.default", "kubernetes.default.svc", "kubernetes.default.svc.cluster", "kubernetes.default.svc.cluster.local" ], "key": { "algo": "rsa", "size": 2048 }, "names": [ { "C": "CN", "ST": "Beijing", "L": "Beijing", "O": "kubemsb", "OU": "CN" } ] } EOF 说明: 如果 hosts 字段不为空则需要指定授权使用该证书的 IP(含VIP) 或域名列表。由于该证书被 集群使用,需要将节点的IP都填上,为了方便后期扩容可以多写几个预留的IP。 同时还需要填写 service 网络的首个IP(一般是 kube-apiserver 指定的 service-cluster-ip-range 网段的第一个IP,如 10.96.0.1)。 2.5.5.2 生成apiserver证书及token文件cfssl gencert -ca=ca.pem -ca-key=ca-key.pem -config=ca-config.json -profile=kubernetes kube-apiserver-csr.json | cfssljson -bare kube-apiserver cat > token.csv << EOF $(head -c 16 /dev/urandom | od -An -t x | tr -d ' '),kubelet-bootstrap,10001,"system:kubelet-bootstrap" EOF 说明: 创建TLS机制所需TOKEN TLS Bootstraping:Master apiserver启用TLS认证后,Node节点kubelet和kube-proxy与kube-apiserver进行通信,必须使用CA签发的有效证书才可以,当Node节点很多时,这种客户端证书颁发需要大量工作,同样也会增加集群扩展复杂度。为了简化流程,Kubernetes引入了TLS bootstraping机制来自动颁发客户端证书,kubelet会以一个低权限用户自动向apiserver申请证书,kubelet的证书由apiserver动态签署。所以强烈建议在Node上使用这种方式,目前主要用于kubelet。而kube-proxy还是由我们统一颁发一个证书。 2.5.5.3 创建apiserver服务配置文件k8s-master01 cat > /etc/kubernetes/kube-apiserver.conf << EOF KUBE_APISERVER_OPTS="--enable-admission-plugins=NamespaceLifecycle,NodeRestriction,LimitRanger,ServiceAccount,DefaultStorageClass,ResourceQuota \ --anonymous-auth=false \ --bind-address=192.168.31.34 \ --secure-port=6443 \ --advertise-address=192.168.31.34 \ --authorization-mode=Node,RBAC \ --runtime-config=api/all=true \ --enable-bootstrap-token-auth \ --service-cluster-ip-range=10.96.0.0/16 \ --token-auth-file=/etc/kubernetes/token.csv \ --service-node-port-range=30000-32767 \ --tls-cert-file=/etc/kubernetes/ssl/kube-apiserver.pem \ --tls-private-key-file=/etc/kubernetes/ssl/kube-apiserver-key.pem \ --client-ca-file=/etc/kubernetes/ssl/ca.pem \ --kubelet-client-certificate=/etc/kubernetes/ssl/kube-apiserver.pem \ --kubelet-client-key=/etc/kubernetes/ssl/kube-apiserver-key.pem \ --service-account-key-file=/etc/kubernetes/ssl/ca-key.pem \ --service-account-signing-key-file=/etc/kubernetes/ssl/ca-key.pem \ --service-account-issuer=api \ --etcd-cafile=/etc/etcd/ssl/ca.pem \ --etcd-certfile=/etc/etcd/ssl/etcd.pem \ --etcd-keyfile=/etc/etcd/ssl/etcd-key.pem \ --etcd-servers=https://192.168.31.34:2379,https://192.168.31.35:2379,https://192.168.31.36:2379 \ --allow-privileged=true \ --apiserver-count=3 \ --audit-log-maxage=30 \ --audit-log-maxbackup=3 \ --audit-log-maxsize=100 \ --audit-log-path=/var/log/kube-apiserver-audit.log \ --event-ttl=1h \ --v=4" EOF 2.5.5.4 创建apiserver服务管理配置文件cat > /etc/systemd/system/kube-apiserver.service << "EOF" [Unit] Description=Kubernetes API Server Documentation=https://github.com/kubernetes/kubernetes After=etcd.service Wants=etcd.service [Service] EnvironmentFile=-/etc/kubernetes/kube-apiserver.conf ExecStart=/usr/local/bin/kube-apiserver $KUBE_APISERVER_OPTS Restart=on-failure RestartSec=5 Type=notify LimitNOFILE=65536 [Install] WantedBy=multi-user.target EOF 2.5.5.5 同步文件到集群master节点cp ca*.pem /etc/kubernetes/ssl/ cp kube-apiserver*.pem /etc/kubernetes/ssl/ cp token.csv /etc/kubernetes/ scp /etc/kubernetes/token.csv k8s-master02:/etc/kubernetes scp /etc/kubernetes/token.csv k8s-master03:/etc/kubernetes scp /etc/kubernetes/ssl/kube-apiserver*.pem k8s-master02:/etc/kubernetes/ssl scp /etc/kubernetes/ssl/kube-apiserver*.pem k8s-master03:/etc/kubernetes/ssl scp /etc/kubernetes/ssl/ca*.pem k8s-master02:/etc/kubernetes/ssl scp /etc/kubernetes/ssl/ca*.pem k8s-master03:/etc/kubernetes/ssl k8s-master02 # cat > /etc/kubernetes/kube-apiserver.conf <<EOF KUBE_APISERVER_OPTS="--enable-admission-plugins=NamespaceLifecycle,NodeRestriction,LimitRanger,ServiceAccount,DefaultStorageClass,ResourceQuota \ --anonymous-auth=false \ --bind-address=192.168.31.35 \ --secure-port=6443 \ --advertise-address=192.168.31.35 \ --authorization-mode=Node,RBAC \ --runtime-config=api/all=true \ --enable-bootstrap-token-auth \ --service-cluster-ip-range=10.96.0.0/16 \ --token-auth-file=/etc/kubernetes/token.csv \ --service-node-port-range=30000-32767 \ --tls-cert-file=/etc/kubernetes/ssl/kube-apiserver.pem \ --tls-private-key-file=/etc/kubernetes/ssl/kube-apiserver-key.pem \ --client-ca-file=/etc/kubernetes/ssl/ca.pem \ --kubelet-client-certificate=/etc/kubernetes/ssl/kube-apiserver.pem \ --kubelet-client-key=/etc/kubernetes/ssl/kube-apiserver-key.pem \ --service-account-key-file=/etc/kubernetes/ssl/ca-key.pem \ --service-account-signing-key-file=/etc/kubernetes/ssl/ca-key.pem \ --service-account-issuer=api \ --etcd-cafile=/etc/etcd/ssl/ca.pem \ --etcd-certfile=/etc/etcd/ssl/etcd.pem \ --etcd-keyfile=/etc/etcd/ssl/etcd-key.pem \ --etcd-servers=https://192.168.31.34:2379,https://192.168.31.35:2379,https://192.168.31.36:2379 \ --allow-privileged=true \ --apiserver-count=3 \ --audit-log-maxage=30 \ --audit-log-maxbackup=3 \ --audit-log-maxsize=100 \ --audit-log-path=/var/log/kube-apiserver-audit.log \ --event-ttl=1h \ --v=4" EOF k8s-master03 # cat > /etc/kubernetes/kube-apiserver.conf <<EOF KUBE_APISERVER_OPTS="--enable-admission-plugins=NamespaceLifecycle,NodeRestriction,LimitRanger,ServiceAccount,DefaultStorageClass,ResourceQuota \ --anonymous-auth=false \ --bind-address=192.168.31.36 \ --secure-port=6443 \ --advertise-address=192.168.31.36 \ --authorization-mode=Node,RBAC \ --runtime-config=api/all=true \ --enable-bootstrap-token-auth \ --service-cluster-ip-range=10.96.0.0/16 \ --token-auth-file=/etc/kubernetes/token.csv \ --service-node-port-range=30000-32767 \ --tls-cert-file=/etc/kubernetes/ssl/kube-apiserver.pem \ --tls-private-key-file=/etc/kubernetes/ssl/kube-apiserver-key.pem \ --client-ca-file=/etc/kubernetes/ssl/ca.pem \ --kubelet-client-certificate=/etc/kubernetes/ssl/kube-apiserver.pem \ --kubelet-client-key=/etc/kubernetes/ssl/kube-apiserver-key.pem \ --service-account-key-file=/etc/kubernetes/ssl/ca-key.pem \ --service-account-signing-key-file=/etc/kubernetes/ssl/ca-key.pem \ --service-account-issuer=api \ --etcd-cafile=/etc/etcd/ssl/ca.pem \ --etcd-certfile=/etc/etcd/ssl/etcd.pem \ --etcd-keyfile=/etc/etcd/ssl/etcd-key.pem \ --etcd-servers=https://192.168.31.34:2379,https://192.168.31.35:2379,https://192.168.31.36:2379 \ --allow-privileged=true \ --apiserver-count=3 \ --audit-log-maxage=30 \ --audit-log-maxbackup=3 \ --audit-log-maxsize=100 \ --audit-log-path=/var/log/kube-apiserver-audit.log \ --event-ttl=1h \ --v=4" EOF k8s-master01 scp /etc/systemd/system/kube-apiserver.service k8s-master02:/etc/systemd/system/kube-apiserver.service scp /etc/systemd/system/kube-apiserver.service k8s-master03:/etc/systemd/system/kube-apiserver.service 2.5.5.6 启动apiserver服务systemctl daemon-reload systemctl enable --now kube-apiserver systemctl status kube-apiserver # 测试 curl --insecure https://192.168.31.34:6443/ curl --insecure https://192.168.31.35:6443/ curl --insecure https://192.168.31.36:6443/ curl --insecure https://192.168.31.100:6443/
-
k8s 1.28高可用搭建kubectl集群05 1 部署kubectl1.1 创建kubectl证书请求文件cat > admin-csr.json << "EOF" { "CN": "admin", "hosts": [], "key": { "algo": "rsa", "size": 2048 }, "names": [ { "C": "CN", "ST": "Beijing", "L": "Beijing", "O": "system:masters", "OU": "system" } ] } EOF 说明: 后续 kube-apiserver 使用 RBAC 对客户端(如 kubelet、kube-proxy、Pod)请求进行授权; kube-apiserver 预定义了一些 RBAC 使用的 RoleBindings,如 cluster-admin 将 Group system:masters 与 Role cluster-admin 绑定,该 Role 授予了调用kube-apiserver 的所有 API的权限; O指定该证书的 Group 为 system:masters,kubelet 使用该证书访问 kube-apiserver 时 ,由于证书被 CA 签名,所以认证通过,同时由于证书用户组为经过预授权的 system:masters,所以被授予访问所有 API 的权限; 注: 这个admin 证书,是将来生成管理员用的kubeconfig 配置文件用的,现在我们一般建议使用RBAC 来对kubernetes 进行角色权限控制, kubernetes 将证书中的CN 字段 作为User, O 字段作为 Group; "O": "system:masters", 必须是system:masters,否则后面kubectl create clusterrolebinding报错。 1.2 生成证书文件cfssl gencert -ca=ca.pem -ca-key=ca-key.pem -config=ca-config.json -profile=kubernetes admin-csr.json | cfssljson -bare admin 1.3 复制文件到指定目录cp admin*.pem /etc/kubernetes/ssl/ 1.4 生成kubeconfig配置文件kube.config 为 kubectl 的配置文件,包含访问 apiserver 的所有信息,如 apiserver 地址、CA 证书和自身使用的证书kubectl config set-cluster kubernetes --certificate-authority=ca.pem --embed-certs=true --server=https://192.168.31.100:6443 --kubeconfig=kube.config kubectl config set-credentials admin --client-certificate=admin.pem --client-key=admin-key.pem --embed-certs=true --kubeconfig=kube.config kubectl config set-context kubernetes --cluster=kubernetes --user=admin --kubeconfig=kube.config kubectl config use-context kubernetes --kubeconfig=kube.config 1.5 准备kubectl配置文件并进行角色绑定mkdir ~/.kube cp kube.config ~/.kube/config kubectl create clusterrolebinding kube-apiserver:kubelet-apis --clusterrole=system:kubelet-api-admin --user kubernetes --kubeconfig=/root/.kube/config 1.6 查看集群状态export KUBECONFIG=$HOME/.kube/config 查看集群信息 kubectl cluster-info 查看集群组件状态 kubectl get componentstatuses 查看命名空间中资源对象 kubectl get all --all-namespaces 1.7 同步kubectl配置文件到集群其它master节点k8s-master02: mkdir /root/.kube k8s-master03: mkdir /root/.kube scp /root/.kube/config k8s-master02:/root/.kube/config scp /root/.kube/config k8s-master03:/root/.kube/config 1.8 配置kubectl命令补全(可选)yum install -y bash-completion source /usr/share/bash-completion/bash_completion source <(kubectl completion bash) kubectl completion bash > ~/.kube/completion.bash.inc source '/root/.kube/completion.bash.inc' source $HOME/.bash_profile
-
k8s 1.28高可用搭建kube-controller-manager集群06 1 部署kube-controller-manager1.1 创建kube-controller-manager证书请求文件cat > kube-controller-manager-csr.json << "EOF" { "CN": "system:kube-controller-manager", "key": { "algo": "rsa", "size": 2048 }, "hosts": [ "127.0.0.1", "192.168.31.34", "192.168.31.35", "192.168.31.36" ], "names": [ { "C": "CN", "ST": "Beijing", "L": "Beijing", "O": "system:kube-controller-manager", "OU": "system" } ] } EOF 说明: hosts 列表包含所有 kube-controller-manager 节点 IP; CN 为 system:kube-controller-manager; O 为 system:kube-controller-manager,kubernetes 内置的 ClusterRoleBindings system:kube-controller-manager 赋予 kube-controller-manager 工作所需的权限 1.2 创建kube-controller-manager证书文件cfssl gencert -ca=ca.pem -ca-key=ca-key.pem -config=ca-config.json -profile=kubernetes kube-controller-manager-csr.json | cfssljson -bare kube-controller-manager # ls kube-controller-manager.csr kube-controller-manager-csr.json kube-controller-manager-key.pem kube-controller-manager.pem 1.3 创建kube-controller-manager的kube-controller-manager.kubeconfigkubectl config set-cluster kubernetes --certificate-authority=ca.pem --embed-certs=true --server=https://192.168.31.100:6443 --kubeconfig=kube-controller-manager.kubeconfig kubectl config set-credentials system:kube-controller-manager --client-certificate=kube-controller-manager.pem --client-key=kube-controller-manager-key.pem --embed-certs=true --kubeconfig=kube-controller-manager.kubeconfig kubectl config set-context system:kube-controller-manager --cluster=kubernetes --user=system:kube-controller-manager --kubeconfig=kube-controller-manager.kubeconfig kubectl config use-context system:kube-controller-manager --kubeconfig=kube-controller-manager.kubeconfig 1.4 创建kube-controller-manager配置文件cat > kube-controller-manager.conf << "EOF" KUBE_CONTROLLER_MANAGER_OPTS="--secure-port=10257 \ --bind-address=127.0.0.1 \ --kubeconfig=/etc/kubernetes/kube-controller-manager.kubeconfig \ --service-cluster-ip-range=10.96.0.0/16 \ --cluster-name=kubernetes \ --cluster-signing-cert-file=/etc/kubernetes/ssl/ca.pem \ --cluster-signing-key-file=/etc/kubernetes/ssl/ca-key.pem \ --allocate-node-cidrs=true \ --cluster-cidr=10.244.0.0/16 \ --root-ca-file=/etc/kubernetes/ssl/ca.pem \ --service-account-private-key-file=/etc/kubernetes/ssl/ca-key.pem \ --leader-elect=true \ --feature-gates=RotateKubeletServerCertificate=true \ --controllers=*,bootstrapsigner,tokencleaner \ --horizontal-pod-autoscaler-sync-period=10s \ --tls-cert-file=/etc/kubernetes/ssl/kube-controller-manager.pem \ --tls-private-key-file=/etc/kubernetes/ssl/kube-controller-manager-key.pem \ --use-service-account-credentials=true \ --v=2" EOF 2.5.7.5 创建服务启动文件cat > kube-controller-manager.service << "EOF" [Unit] Description=Kubernetes Controller Manager Documentation=https://github.com/kubernetes/kubernetes [Service] EnvironmentFile=-/etc/kubernetes/kube-controller-manager.conf ExecStart=/usr/local/bin/kube-controller-manager $KUBE_CONTROLLER_MANAGER_OPTS Restart=on-failure RestartSec=5 [Install] WantedBy=multi-user.target EOF 2.5.7.6 同步文件到集群master节点cp kube-controller-manager*.pem /etc/kubernetes/ssl/ cp kube-controller-manager.kubeconfig /etc/kubernetes/ cp kube-controller-manager.conf /etc/kubernetes/ cp kube-controller-manager.service /usr/lib/systemd/system/ scp kube-controller-manager*.pem k8s-master02:/etc/kubernetes/ssl/ scp kube-controller-manager*.pem k8s-master03:/etc/kubernetes/ssl/ scp kube-controller-manager.kubeconfig kube-controller-manager.conf k8s-master02:/etc/kubernetes/ scp kube-controller-manager.kubeconfig kube-controller-manager.conf k8s-master03:/etc/kubernetes/ scp kube-controller-manager.service k8s-master02:/usr/lib/systemd/system/ scp kube-controller-manager.service k8s-master03:/usr/lib/systemd/system/ #查看证书 openssl x509 -in /etc/kubernetes/ssl/kube-controller-manager.pem -noout -text 2.5.7.7 启动服务systemctl daemon-reload systemctl enable --now kube-controller-manager systemctl status kube-controller-manager kubectl get componentstatuses
-
k8s 1.28高可用搭建基础环境01 Kubernetes(简称为:k8s)是Google在2014年6月开源的一个容器集群管理系统,使用Go语言开发,用于管理云平台中多个主机上的容器化的应用,Kubernetes的目标是让部署容器化的应用简单并且高效,Kubernetes提供了资源调度、部署管理、服务发现、扩容缩容、监控,维护等一整套功能,努力成为跨主机集群的自动部署、扩展以及运行应用程序容器的平台。 它支持一系列容器工具, 包括Docker、Containerd等。一、集群环境准备1.1 主机规划 主机IP地址 主机名 主机配置 主机角色 软件列表 192.168.31.34 k8s-master01 4C4G master kube-apiserver、kube-controller-manager、kube-scheduler、etcd、kubelet、kube-proxy、Containerd、runc 192.168.31.35 k8s-master02 4C4G master kube-apiserver、kube-controller-manager、kube-scheduler、etcd、kubelet、kube-proxy、Containerd、runc 192.168.31.36 k8s-master03 4C4G master kube-apiserver、kube-controller-manager、kube-scheduler、etcd、kubelet、kube-proxy、Containerd、runc 192.168.31.37 k8s-node01 4C4G worker kubelet、kube-proxy、Containerd、runc 192.168.31.38 k8s-node02 4C4G worker kubelet、kube-proxy、Containerd、runc 192.168.31.32 k8s-ha01 1C2G LB nginx、keepalived 192.168.31.33 k8s-ha02 1C2G LB nginx、keepalived 192.168.31.100 / / VIP(虚拟IP) 1.2 软件版本 软件名称 版本 备注 CentOS7 kernel版本:5.4.260 kubernetes v1.28.4 etcd v3.5.10 最新版本 calico v3.26.4 coredns v1.11.1 containerd 1.7.9 runc 1.1.10 nginx 1.21.6 YUM源默认 keepalived 1.3.5 YUM源默认 1.3 网络分配 网络名称 网段 备注 Node网络 192.168.31.0/24 Service网络 10.96.0.0/16 Pod网络 10.244.0.0/16 二、集群部署2.1主机准备2.1.1 主机名设置hostnamectl set-hostname xxx 2.1.2 主机与IP地址解析cat >> /etc/hosts << EOF 192.168.31.32 k8s-ha01 192.168.31.33 k8s-ha02 192.168.31.34 k8s-master01 192.168.31.35 k8s-master02 192.168.31.36 k8s-master03 192.168.31.37 k8s-node01 192.168.31.38 k8s-node02 EOF 2.1.3 主机安全设置2.1.3.1 关闭防火墙systemctl stop firewalld systmctl disable firewalld firewall-cmd --state 2.1.3.2 关闭selinuxsetenforce 0 sed -ri 's/SELINUX=enforcing/SELINUX=disabled/' /etc/selinux/config sestatus 2.1.4 交换分区设置swapoff -a sed -ri 's/.*swap.*/#&/' /etc/fstab echo "vm.swappiness=0" >> /etc/sysctl.conf sysctl -p 2.1.5 主机系统时间同步安装软件 yum -y install ntpdate 制定时间同步计划任务 crontab -e 0 */1 * * * ntpdate time1.aliyun.com 2.1.6 主机系统优化limit优化ulimit -SHn 65535 cat <<EOF >> /etc/security/limits.conf * soft nofile 655360 * hard nofile 131072 * soft nproc 655350 * hard nproc 655350 * soft memlock unlimited * hard memlock unlimited EOF 2.1.7 ipvs管理工具安装及模块加载为集群节点安装,负载均衡节点不用安装yum -y install ipvsadm ipset sysstat conntrack libseccomp 所有节点配置ipvs模块,在内核4.19+版本nf_conntrack_ipv4已经改为nf_conntrack, 4.18以下使用nf_conntrack_ipv4即可: modprobe -- ip_vs modprobe -- ip_vs_rr modprobe -- ip_vs_wrr modprobe -- ip_vs_sh modprobe -- nf_conntrack 创建 /etc/modules-load.d/ipvs.conf 并加入以下内容: cat >/etc/modules-load.d/ipvs.conf <<EOF ip_vs ip_vs_lc ip_vs_wlc ip_vs_rr ip_vs_wrr ip_vs_lblc ip_vs_lblcr ip_vs_dh ip_vs_sh ip_vs_fo ip_vs_nq ip_vs_sed ip_vs_ftp ip_vs_sh nf_conntrack ip_tables ip_set xt_set ipt_set ipt_rpfilter ipt_REJECT ipip EOF 2.1.8 加载containerd相关内核模块临时加载模块 modprobe overlay modprobe br_netfilter 永久性加载模块 cat > /etc/modules-load.d/containerd.conf << EOF overlay br_netfilter EOF 设置为开机启动 systemctl enable --now systemd-modules-load.service 2.1.9 Linux内核升级在所有节点中安装,需要重新操作系统更换内核。[root@wangmanyuan ~]# yum -y install perl [root@wangmanyuan ~]# rpm --import https://www.elrepo.org/RPM-GPG-KEY-elrepo.org [root@wangmanyuan ~]# yum -y install https://www.elrepo.org/elrepo-release-7.0-4.el7.elrepo.noarch.rpm [root@wangmanyuan ~]# yum --disablerepo="*" --enablerepo="elrepo-kernel" list available Loaded plugins: fastestmirror, langpacks Loading mirror speeds from cached hostfile * elrepo-kernel: mirrors.tuna.tsinghua.edu.cn Available Packages elrepo-release.noarch 7.0-6.el7.elrepo elrepo-kernel kernel-lt.x86_64 5.4.260-1.el7.elrepo elrepo-kernel kernel-lt-devel.x86_64 5.4.260-1.el7.elrepo elrepo-kernel kernel-lt-doc.noarch 5.4.260-1.el7.elrepo elrepo-kernel kernel-lt-headers.x86_64 5.4.260-1.el7.elrepo elrepo-kernel kernel-lt-tools.x86_64 5.4.260-1.el7.elrepo elrepo-kernel kernel-lt-tools-libs.x86_64 5.4.260-1.el7.elrepo elrepo-kernel kernel-lt-tools-libs-devel.x86_64 5.4.260-1.el7.elrepo elrepo-kernel kernel-ml.x86_64 6.6.1-1.el7.elrepo elrepo-kernel kernel-ml-devel.x86_64 6.6.1-1.el7.elrepo elrepo-kernel kernel-ml-doc.noarch 6.6.1-1.el7.elrepo elrepo-kernel kernel-ml-headers.x86_64 6.6.1-1.el7.elrepo elrepo-kernel kernel-ml-tools.x86_64 6.6.1-1.el7.elrepo elrepo-kernel kernel-ml-tools-libs.x86_64 6.6.1-1.el7.elrepo elrepo-kernel kernel-ml-tools-libs-devel.x86_64 6.6.1-1.el7.elrepo elrepo-kernel perf.x86_64 5.4.260-1.el7.elrepo elrepo-kern [root@wangmanyuan ~]# yum --enablerepo="elrepo-kernel" install kernel-lt.x86_64 [root@wangmanyuan ~]# grub2-set-default 0 [root@wangmanyuan ~]# grub2-mkconfig -o /boot/grub2/grub.cfg [root@wangmanyuan ~]# reboot 2.1.10 Linux内核优化cat <<EOF > /etc/sysctl.d/k8s.conf net.ipv4.ip_forward = 1 net.bridge.bridge-nf-call-iptables = 1 net.bridge.bridge-nf-call-ip6tables = 1 fs.may_detach_mounts = 1 vm.overcommit_memory=1 vm.panic_on_oom=0 fs.inotify.max_user_watches=89100 fs.file-max=52706963 fs.nr_open=52706963 net.netfilter.nf_conntrack_max=2310720 net.ipv4.tcp_keepalive_time = 600 net.ipv4.tcp_keepalive_probes = 3 net.ipv4.tcp_keepalive_intvl =15 net.ipv4.tcp_max_tw_buckets = 36000 net.ipv4.tcp_tw_reuse = 1 net.ipv4.tcp_max_orphans = 327680 net.ipv4.tcp_orphan_retries = 3 net.ipv4.tcp_syncookies = 1 net.ipv4.tcp_max_syn_backlog = 16384 net.ipv4.ip_conntrack_max = 131072 net.ipv4.tcp_max_syn_backlog = 16384 net.ipv4.tcp_timestamps = 0 net.core.somaxconn = 16384 EOF sysctl --system 所有节点配置完内核后,重启服务器,保证重启后内核依旧加载 reboot -h now 重启后查看ipvs模块加载情况: lsmod | grep --color=auto -e ip_vs -e nf_conntrack 重启后查看containerd相关模块加载情况: lsmod | egrep 'br_netfilter | overlay' 2.1.11 其它工具安装(选装)yum install wget jq psmisc vim net-tools telnet yum-utils device-mapper-persistent-data lvm2 git lrzsz -y
-
k8s 1.28高可用搭建nginx/keepalived基础环境02 1. nginx安装1.1 所有的master节点创建运行nginx的用户useradd nginx -s /sbin/nologin -M 1.2 安装依赖mkdir -p /data/k8s-work cd /data/k8s-work yum -y install pcre pcre-devel openssl openssl-devel gcc gcc-c++ automake autoconf libtool make 1.3 下载nginx软件包wget http://nginx.org/download/nginx-1.21.6.tar.gz 1.4 解压软件包tar xf nginx-1.21.6.tar.gz 1.5 配置nginxcd nginx-1.21.6 ./configure --prefix=/usr/local/nginx/ \ --with-pcre \ --with-http_ssl_module \ --with-http_stub_status_module \ --with-stream \ --with-http_stub_status_module \ --with-http_gzip_static_module 1.6 编译并安装nginxmake -j 4 && make install 1.7 使用systemctl管理,并设置开机启动cat > /usr/lib/systemd/system/nginx.service <<EOF [Unit] Description=The nginx HTTP and reverse proxy server After=network.target sshd-keygen.service [Service] Type=forking EnvironmentFile=/etc/sysconfig/sshd ExecStartPre=/usr/local/nginx/sbin/nginx -t -c /usr/local/nginx/conf/nginx.conf ExecStart=/usr/local/nginx/sbin/nginx -c /usr/local/nginx/conf/nginx.conf ExecReload=/usr/local/nginx/sbin/nginx -s reload ExecStop=/usr/local/nginx/sbin/nginx -s stop Restart=on-failure RestartSec=42s [Install] WantedBy=multi-user.target EOF 1.8 检查nginx服务是否启动systemctl enable --now nginx.service systemctl status nginx ps -ef|grep nginx 1.9 同步nginx软件包和脚本到集群的k8s-ha02scp -rp k8s-ha02:/usr/local/nginx/ scp -rp k8s-ha02:/usr/lib/systemd/system/nginx.service nginx配置文件2.1 编辑nginx配置文件cat > /usr/local/nginx/conf/nginx.conf <<EOF user nginx nginx; worker_processes auto; events { worker_connections 20240; use epoll; } error_log /var/log/nginx_error.log info; stream { upstream kube-servers { hash $remote_addr consistent; server k8s-master01:6443 weight=5 max_fails=1 fail_timeout=3s; server k8s-master02:6443 weight=5 max_fails=1 fail_timeout=3s; server k8s-master03:6443 weight=5 max_fails=1 fail_timeout=3s; } server { listen 6443; proxy_connect_timeout 3s; proxy_timeout 3000s; proxy_pass kube-servers; } } EOF 2.2 同步nginx的配置文件到k8s-ha02scp -rp k8s-ha02:/usr/local/nginx/conf/nginx.conf 2.3 所有节点启动nginx服务systemctl enable --now nginx systemctl reload nginx [root@k8s-ha01 nginx-1.21.6]# netstat -lntp|grep 6443 tcp 0 0 0.0.0.0:6443 0.0.0.0:* LISTEN 5119/nginx: master 3.部署keepalived3.1 安装keepalived组件yum -y install keepalived 3.2 修改keepalive的配置文件(根据实际环境,interface eth0可能需要修改为interface ens33)3.2.1 编写配置文件,ha节点需要修改router_id和mcast_src_ip的值即可。3.2.1.1 k8s-ha01节点cat > /etc/keepalived/keepalived.conf <<EOF ! Configuration File for keepalived global_defs { router_id 192.168.31.32 } vrrp_script chk_nginx { script "/etc/keepalived/check_port.sh" interval 2 weight -20 } vrrp_instance VI_1 { state MASTER interface eth0 virtual_router_id 100 priority 100 advert_int 1 mcast_src_ip 192.168.31.32 nopreempt authentication { auth_type PASS auth_pass wangmanyuan.com } track_script { chk_nginx } virtual_ipaddress { 192.168.31.100 } } EOF 3.2.1.1 k8s-ha02节点cat > /etc/keepalived/keepalived.conf <<EOF ! Configuration File for keepalived global_defs { router_id 192.168.31.33 } vrrp_script chk_nginx { script "/etc/keepalived/check_port.sh" interval 2 weight -20 } vrrp_instance VI_1 { state BACKUP interface eth0 virtual_router_id 100 priority 99 advert_int 2 mcast_src_ip 192.168.31.33 nopreempt authentication { auth_type PASS auth_pass wangmanyuan.com } track_script { chk_nginx } virtual_ipaddress { 192.168.31.100 } } EOF 3.2.2 各节点编写健康检查脚本cat > /etc/keepalived/check_port.sh <<\EOF #!/bin/bash err=0 for k in $(seq 1 3) do check_code=$(pgrep nginx) if [[ $check_code == "" ]]; then err=$(expr $err + 1) sleep 1 continue else err=0 break fi done if [[ $err != "0" ]]; then echo "systemctl stop keepalived" /usr/bin/systemctl stop keepalived exit 1 else exit 0 fi EOF chmod +x /etc/keepalived/check_port.sh 3.3 启动keepalivedsystemctl enable --now keepalived 3.4 测试keepalivedip a # 查看VIP在哪个节点 systemct stop keepalived # 停止服务,观察是否飘逸VIP 3.5 参数说明温馨提示: router_id: 节点ip,master每个节点配置自己的IP mcast_src_ip: 节点IP,master每个节点配置自己的IP virtual_ipaddress: 虚拟IP,即VIP。 interface: 指定接口的名称。 virtual_router_id: 有效值为0-255,可以理解为一个组ID,只有相同的ID才被确认为一个组。 如果每个keepalived实例修改的ID不一致,则会出现各自有一个VIP的现象。 ```