
搜索到
4
篇与
的结果
-
 商品分类 A.新建分支goods_cate新建分支goods_cate并推送到码云git checkout -b goods_categit push -u origin goods_cateB.创建子级路由创建categories子级路由组件并设置路由规则import Cate from './components/goods/Cate.vue' path: '/home', component: Home, redirect: '/welcome', children: [ { path: "/welcome", component: Welcome }, { path: "/users", component: Users }, { path: "/rights", component: Rights }, { path: "/roles", component: Roles }, { path: "/categories", component: Cate } ] C.添加组件基本布局在Cate.vue组件中添加面包屑导航以及卡片视图中的添加分类按钮<template> <div> <h3>商品分类</h3> <!-- 面包屑导航 --> <el-breadcrumb separator="/"> <el-breadcrumb-item :to="{ path: '/home' }">首页</el-breadcrumb-item> <el-breadcrumb-item>商品管理</el-breadcrumb-item> <el-breadcrumb-item>商品分类</el-breadcrumb-item> </el-breadcrumb> <!-- 卡片视图区域 --> <el-card> <!-- 添加分类按钮区域 --> <el-row> <el-col> <el-button type="primary">添加分类</el-button> </el-col> </el-row> <!-- 分类表格 --> <!-- 分页 --> </el-card> </div> </template> D.请求分类数据请求分类数据并将数据保存在data中<script> export default { data() { return { // 商品分类数据列表 cateList: [], //查询分类数据的条件 queryInfo: { type: 3, pagenum: 1, pagesize: 5 }, //保存总数据条数 total: 0 } }, created() { this.getCateList() }, methods: { async getCateList() { //获取商品分类数据 const { data: res } = await this.$http.get('categories', { params: queryInfo }) if (res.meta.status !== 200) { return this.$message.error('获取商品列表数据失败') } //将数据列表赋值给cateList this.cateList = res.data.result //保存总数据条数 this.total = res.data.total // console.log(res.data); } } } </script> E.使用插件展示数据使用第三方插件vue-table-with-tree-grid展示分类数据1).在vue 控制台中点击依赖->安装依赖->运行依赖->输入vue-table-with-tree-gird->点击安装2).打开main.js,导入vue-table-with-tree-gridimport TreeTable from 'vue-table-with-tree-grid'.....Vue.config.productionTip = false//全局注册组件 Vue.component('tree-table', TreeTable) 3).使用组件展示分类数据 <!-- 分类表格 :data(设置数据源) :columns(设置表格中列配置信息) :selection-type(是否有复选框) :expand-type(是否展开数据) show-index(是否设置索引列) index-text(设置索引列头) border(是否添加纵向边框) :show-row-hover(是否鼠标悬停高亮) --> <tree-table :data="cateList" :columns="columns" :selection-type="false" :expand-type="false" show-index index-text="#" border :show-row-hover="false"> </tree-table> 在数据中添加columns: columns: [ {label:'分类名称',prop:'cat_name'} ] F.自定义数据列使用vue-table-with-tree-grid定义模板列并添加自定义列//先在columns中添加一个列 columns: [ {label:'分类名称',prop:'cat_name'}, //type:'template'(将该列设置为模板列),template:'isok'(设置该列模板的名称为isok) {label:'是否有效',prop:'',type:'template',template:'isok'}, {label:'排序',prop:'',type:'template',template:'order'}, {label:'操作',prop:'',type:'template',template:'opt'} ] <!-- 是否有效区域, 设置对应的模板列: slot="isok"(与columns中设置的template一致) --> <template slot="isok" slot-scope="scope"> <i class="el-icon-success" v-if="scope.row.cat_deleted === false" style="color:lightgreen"></i> <i class="el-icon-error" v-else style="color:red"></i> </template> <!-- 排序 --> <template slot="order" slot-scope="scope"> <el-tag size="mini" v-if="scope.row.cat_level===0">一级</el-tag> <el-tag size="mini" type="success" v-else-if="scope.row.cat_level===1">二级</el-tag> <el-tag size="mini" type="warning" v-else>三级</el-tag> </template> <!-- 操作 --> <template slot="opt" slot-scope="scope"> <el-button size="mini" type="primary" icon="el-icon-edit">编辑</el-button> <el-button size="mini" type="danger" icon="el-icon-delete">删除</el-button> </template> G.完成分页功能<!-- 分页 --> <el-pagination @size-change="handleSizeChange" @current-change="handleCurrentChange" :current-page="queryInfo.pagenum" :page-sizes="[3, 5, 10, 15]" :page-size="queryInfo.pagesize" layout="total, sizes, prev, pager, next, jumper" :total="total"> </el-pagination> //添加对应的事件函数 methods:{ ....... handleSizeChange(newSize){ //当pagesize发生改变时触发 this.queryInfo.pagesize = newSize; this.getCateList(); }, handleCurrentChange(newPage){ //当pagenum发生改变时触发 this.queryInfo.pagenum = newPage; this.getCateList(); } } H.完成添加分类...... <!-- 添加分类按钮区域 --> <el-row> <el-col> <el-button type="primary" @click="showAddCateDialog">添加分类</el-button> </el-col> </el-row> ...... <!-- 添加分类对话框 --> <el-dialog title="添加分类" :visible.sync="addCateDialogVisible" width="50%" @close="addCateDialogClosed"> <!-- 添加分类表单 --> <el-form :model="addCateForm" :rules="addCateFormRules" ref="addCateFormRuleForm" label-width="100px"> <el-form-item label="分类名称" prop="cat_name"> <el-input v-model="addCateForm.cat_name"></el-input> </el-form-item> <el-form-item label="父级分类" prop="cat_pid"> </el-form-item> </el-form> <span slot="footer" class="dialog-footer"> <el-button @click="addCateDialogVisible = false">取 消</el-button> <el-button type="primary" @click="addCate">确 定</el-button> </span> </el-dialog> //用来显示或隐藏添加分类对话框 addCateDialogVisible: false, //添加分类的表单数据对象 addCateForm:{ //分类名称 cat_name:'', //添加分类的父级id,0则表示父级为0.添加一级分类 cat_pid:0, //添加分类的等级,0则表示添加一级分类 cat_level:0 }, //添加分类校验规则 addCateFormRules:{ //验证规则 cat_name:[ {required:true , message:'请输入分类名称',trigger:'blur'} ] }, //保存1,2级父级分类的列表 parentCateList:[] ....... showAddCateDialog() { //调用getParentCateList获取分类列表 this.getParentCateList() //显示添加分类对话框 this.addCateDialogVisible = true }, async getParentCateList(){ //获取父级分类数据列表 const { data: res } = await this.$http.get('categories', { params: {type:2} }) if (res.meta.status !== 200) { return this.$message.error('获取商品分类列表数据失败') } this.parentCateList = res.data } 添加级联菜单显示父级分类先导入Cascader组件,并注册然后添加使用级联菜单组件:<el-form-item label="父级分类" prop="cat_pid"> <!-- expandTrigger='hover'(鼠标悬停触发级联) v-model(设置级联菜单绑定数据) :options(指定级联菜单数据源) :props(用来配置数据显示的规则) clearable(提供“X”号完成删除文本功能) change-on-select(是否可以选中任意一级的菜单) --> <el-cascader expandTrigger='hover' v-model="selectedKeys" :options="parentCateList" :props="cascaderProps" @change="parentCateChange" clearable change-on-select></el-cascader> </el-form-item> 添加数据 //配置级联菜单中数据如何展示 cascaderProps:{ value:'cat_id', label:'cat_name', children:'children', expandTrigger:'hover' }, //绑定用户选择的分类值 selectedKeys:[] ..... methods:{ ..... parentCateChange(){ //级联菜单中选择项发生变化时触发 console.log(this.selectedKeys) //如果用户选择了父级分类 if(this.selectedKeys.length > 0){ //则将数组中的最后一项设置为父级分类 this.addCateForm.cat_pid = this.selectedKeys[this.selectedKeys.length - 1] //level也要跟着发生变化 this.addCateForm.cat_level = this.selectedKeys.length return }else{ this.addCateForm.cat_pid = 0 this.addCateForm.cat_level = 0 return } }, addCateDialogClosed(){ //当关闭添加分类对话框时,重置表单 this.$refs.addCateFormRef.resetFields() this.selectedKeys = []; this.addCateForm.cat_pid = 0 this.addCateForm.cat_level = 0 }, addCate() { //点击确定,完成添加分类 console.log(this.addCateForm) this.$refs.addCateFormRef.validate(async valid => { if (!valid) return //发送请求完成添加分类 const { data: res } = await this.$http.post( 'categories', this.addCateForm ) if (res.meta.status !== 201) { return this.$message.error('添加分类失败') } this.$message.success('添加分类成功') this.getCateList() this.addCateDialogVisible = false }) } } I.推送代码制作完添加分类之后,将代码提交到仓库,推送到码云,将goods_cate分支合并到mastergit add .git commit -m '完成商品分类'git pushgit checkout mastergit merge goods_cate2.参数管理只允许给三级分类内容设置参数,参数分为动态参数和静态参数属性A.添加子级组件添加Params.vue子组件,并在router.js中引入该组件并设置路由规则import Params from './components/goods/Params.vue' ...... path: '/home', component: Home, redirect: '/welcome', children: [ { path: "/welcome", component: Welcome }, { path: "/users", component: Users }, { path: "/rights", component: Rights }, { path: "/roles", component: Roles }, { path: "/categories", component: Cate }, { path: "/params", component: Params } ] B.完成组件基本布局完成Params.vue组件的基本布局其中警告提示信息使用了el-alert,在element.js引入该组件并注册<template> <div> <h3>分类参数</h3> <!-- 面包屑导航 --> <el-breadcrumb separator="/"> <el-breadcrumb-item :to="{ path: '/home' }">首页</el-breadcrumb-item> <el-breadcrumb-item>商品管理</el-breadcrumb-item> <el-breadcrumb-item>分类参数</el-breadcrumb-item> </el-breadcrumb> <!-- 卡片视图区域 --> <el-card> <!-- 警告区域 :closable="false"(是否展示“X”号) show-icon(显示图标) --> <el-alert title="注意:只允许为第三级分类设置相关参数" type="warning" :closable="false" show-icon> </el-alert> <!-- 选择商品分类区域 --> <el-row class="cat_opt"> <el-col> <span>选择商品分类:</span> <!-- 选择商品分类的级联选择框 --> </el-col> <el-col></el-col> </el-row> </el-card> </div> </template> C.完成级联选择框完成商品分类级联选择框<!-- 选择商品分类区域 --> <el-row class="cat_opt"> <el-col> <span>选择商品分类:</span> <!-- 选择商品分类的级联选择框 --> <el-cascader expandTrigger='hover' v-model="selectedCateKeys" :options="cateList" :props="cateProps" @change="handleChange" clearable></el-cascader> </el-col> <el-col></el-col> </el-row> ...... <script> export default { data() { return { //分类列表 cateList:[], //用户在级联下拉菜单中选中的分类id selectedCateKeys:[], //配置级联菜单中数据如何展示 cateProps: { value: 'cat_id', label: 'cat_name', children: 'children' } } }, created() { this.getCateList() }, methods: { async getCateList(){ //获取所有的商品分类列表 const { data: res } = await this.$http.get('categories') if (res.meta.status !== 200) { return this.$message.error('获取分类数据失败') } //将数据列表赋值给cateList this.cateList = res.data // //保存总数据条数 // this.total = res.data.total // console.log(res.data); }, handleChange(){ //当用户在级联菜单中选择内容改变时触发 console.log(this.selectedCateKeys); } } } </script> D.展示参数展示动态参数数据以及静态属性数据<!-- tab页签区域 --> <el-tabs v-model="activeName" @tab-click="handleTabClick"> <!-- 添加动态参数的面板 将标签页改为many --> <el-tab-pane label="动态参数" name="many"> <el-button size="mini" type="primary" :disabled="isButtonDisabled">添加参数</el-button> <!-- 动态参数表格 --> <el-table :data="manyTableData" border stripe> <!-- 展开行 --> <el-table-column type="expand"></el-table-column> <!-- 索引列 --> <el-table-column type="index"></el-table-column> <el-table-column label="参数名称" prop="attr_name"></el-table-column> <el-table-column label="操作"> <template slot-scope="scope"> <el-button size="mini" type="primary" icon="el-icon-edit">编辑</el-button> <el-button size="mini" type="danger" icon="el-icon-delete">删除</el-button> </template> </el-table-column> </el-table> </el-tab-pane> <!-- 添加静态属性的面板 将标签页改为only --> <el-tab-pane label="静态属性" name="only"> <el-button size="mini" type="primary" :disabled="isButtonDisabled">添加属性</el-button> <!-- 静态属性表格 --> <el-table :data="onlyTableData" border stripe> <!-- 展开行 --> <el-table-column type="expand"></el-table-column> <!-- 索引列 --> <el-table-column type="index"></el-table-column> <el-table-column label="属性名称" prop="attr_name"></el-table-column> <el-table-column label="操作"> <template slot-scope="scope"> <el-button size="mini" type="primary" icon="el-icon-edit">编辑</el-button> <el-button size="mini" type="danger" icon="el-icon-delete">删除</el-button> </template> </el-table-column> </el-table> </el-tab-pane> </el-tabs> <script> export default { data() { return { ...... //tab页签激活显示的页签项 activeName: 'many', //用来保存动态参数数据 manyTableData: [], //用来保存静态属性数据 onlyTableData: [] } methods: { ....... async handleChange() { //当用户在级联菜单中选择内容改变时触发 console.log(this.selectedCateKeys) //发送请求,根据用户选择的三级分类和面板获取参数数据 const { data: res } = await this.$http.get( `categories/${this.cateId}/attributes`, { params: { sel: this.activeName } } ) if (res.meta.status !== 200) { return this.$message.error('获取参数列表数据失败') } console.log(res.data) if (this.activeName === 'many') { //获取的是动态参数 this.manyTableData = res.data } else if (this.activeName === 'only') { //获取的是静态属性 this.onlyTableData = res.data } }, handleTabClick() { console.log(this.activeName) this.handleChange() } }, computed: { //添加计算属性用来获取按钮禁用与否 isButtonDisabled() { return this.selectedCateKeys.length !== 3 }, //获取选中的三级分类id cateId() { if (this.selectedCateKeys.length === 3) { return this.selectedCateKeys[this.selectedCateKeys.length - 1] } return null } } E.添加参数完成添加参数或属性<!-- 添加参数或属性对话框 --> <el-dialog :title="'添加'+titleText" :visible.sync="addDialogVisible" width="50%" @close="addDialogClosed"> <!-- 添加表单 --> <el-form :model="addForm" :rules="addFormRules" ref="addFormRef" label-width="100px"> <el-form-item :label="titleText" prop="attr_name"> <el-input v-model="addForm.attr_name"></el-input> </el-form-item> </el-form> <span slot="footer" class="dialog-footer"> <el-button @click="addDialogVisible = false">取 消</el-button> <el-button type="primary" @click="addParams">确 定</el-button> </span> </el-dialog> export default { data() { return { ....... //控制添加参数.属性对话框的显示或隐藏 addDialogVisible: false, //添加参数的表单数据对象 addForm: { attr_name: '' }, //添加表单验证规则 addFormRules: { attr_name: [{ required: true, message: '请输入名称', trigger: 'blur' }] } } },methods: { ....... addParams() { //当用户点击对话框中的确定时,校验表单 this.$refs.addFormRef.validate(async valid => { //校验不通过,return if (!valid) return //校验通过,发送请求完成添加参数或者属性 const { data: res } = this.$http.post(`categories/${this.cateId}/attributes`, { attr_name: this.addForm.attr_name, attr_sel: this.activeName, attr_vals: "a,b,c" } ) console.log(res) if (res.meta.status !== 201) { return this.$message.error('添加' + this.titleText + '数据失败') } this.$message.success('添加' + this.titleText + '数据成功') this.addDialogVisible = false this.getCateList() }) } } F.编辑参数完成编辑参数或属性<!-- 修改参数或属性对话框 --> <el-dialog :title="'修改'+titleText" :visible.sync="editDialogVisible" width="50%" @close="editDialogClosed"> <!-- 添加表单 --> <el-form :model="editForm" :rules="editFormRules" ref="editFormRef" label-width="100px"> <el-form-item :label="titleText" prop="attr_name"> <el-input v-model="editForm.attr_name"></el-input> </el-form-item> </el-form> <span slot="footer" class="dialog-footer"> <el-button @click="editDialogVisible = false">取 消</el-button> <el-button type="primary" @click="editParams">确 定</el-button> </span> </el-dialog> export default { data() { return { ....... //控制修改参数.属性对话框的显示或隐藏 editDialogVisible:false, //修改参数.属性对话框中的表单 editForm:{ attr_name:'' }, //修改表单的验证规则 editFormRules:{ attr_name:[ { required: true, message: '请输入名称', trigger: 'blur' } ] } } },methods: { ....... async showEditDialog(attr_id){ //发起请求获取需要修改的那个参数数据 const {data:res} = await this.$http.get(`categories/${this.cateId}/attributes/${attr_id}`, {params:{ attr_sel:this.activeName }}) if (res.meta.status !== 200) { return this.$message.error('获取参数数据失败') } this.editForm = res.data; //显示修改参数.属性对话框 this.editDialogVisible = true; }, editDialogClosed(){ //当关闭修改参数.属性对话框时 this.$refs.editFormRef.resetFields() }, editParams(){ //验证表单 this.$refs.editFormRef.validate(async valid => { if(!valid) return; //发送请求完成修改 const {data:res} = await this.$http.put(`categories/${this.cateId}/attributes/${this.editForm.attr_id}`, {attr_name:this.editForm.attr_name,attr_sel:this.activeName}) if (res.meta.status !== 200) { return this.$message.error('获取参数数据失败') } this.$message.success('修改' + this.titleText + '数据成功') this.editDialogVisible = false this.handleChange(); }) } } G.删除参数删除参数或属性给两个删除按钮添加事件 <el-button size="mini" type="danger" icon="el-icon-delete" @click="removeParams(scope.row.attr_id)">删除</el-button> <el-button size="mini" type="danger" icon="el-icon-delete" @click="removeParams(scope.row.attr_id)">删除</el-button> 添加对应的事件处理函数 async removeParams(attr_id){ //根据id删除对应的参数或属性 //弹窗提示用户是否要删除 const confirmResult = await this.$confirm( '请问是否要删除该'+this.titleText, '删除提示', { confirmButtonText: '确认删除', cancelButtonText: '取消', type: 'warning' } ).catch(err => err) //如果用户点击确认,则confirmResult 为'confirm' //如果用户点击取消, 则confirmResult获取的就是catch的错误消息'cancel' if (confirmResult != 'confirm') { return this.$message.info('已经取消删除') } //没有取消就是要删除,发送请求完成删除 const {data:res} = await this.$http.delete(`categories/${this.cateId}/attributes/${attr_id}`) if (res.meta.status !== 200) { return this.$message.error('删除参数数据失败') } this.$message.success('删除' + this.titleText + '数据成功') this.handleChange() }
 -
用户信息 1.修改用户信息A.为用户列表中的修改按钮绑定点击事件B.在页面中添加修改用户对话框,并修改对话框的属性C.根据id查询需要修改的用户数据//展示编辑用户的对话框 async showEditDialog(id) { //发送请求根据id获取用户信息 const { data: res } = await this.$http.get('users/' + id) //判断如果添加失败,就做提示 if (res.meta.status !== 200) return this.$message.error('获取用户信息失败') //将获取到的数据保存到数据editForm中 this.editForm = res.data //显示弹出窗 this.editDialogVisible = true } D.在弹出窗中添加修改用户信息的表单并做响应的数据绑定以及数据验证<!-- 对话框主体区域 --> <el-form :model="editForm" :rules="editFormRules" ref="editFormRef" label-width="70px"> <el-form-item label="用户名"> <el-input v-model="editForm.username" disabled></el-input> </el-form-item> <el-form-item label="邮箱" prop="email"> <el-input v-model="editForm.email"></el-input> </el-form-item> <el-form-item label="电话" prop="mobile"> <el-input v-model="editForm.mobile"></el-input> </el-form-item> </el-form> 数据绑定以及验证://控制修改用户对话框的显示与否 editDialogVisible: false, //修改用户的表单数据 editForm: { username: '', email: '', mobile: '' }, //修改表单的验证规则对象 editFormRules: { email: [ { required: true, message: '请输入邮箱', trigger: 'blur' }, { validator: checkEmail, message: '邮箱格式不正确,请重新输入', trigger: 'blur' } ], mobile: [ { required: true, message: '请输入手机号码', trigger: 'blur' }, { validator: checkMobile, message: '手机号码不正确,请重新输入', trigger: 'blur' } ] } E.监听对话框关闭事件,在对话框关闭之后,重置表单<el-dialog title="修改用户" :visible.sync="editDialogVisible" width="50%" @close="editDialogClosed"> editDialogClosed(){ //对话框关闭之后,重置表达 this.$refs.editFormRef.resetFields() } F.在用户点击确定按钮的时候,验证数据成功之后发送请求完成修改editUser() { //用户点击修改表单中的确定按钮之后,验证表单数据 this.$refs.editFormRef.validate(async valid => { if (!valid) return this.$message.error('请填写完整用户信息') //发送请求完成修改用户的操作 const { data: res } = await this.$http.put( 'users/' + this.editForm.id, this.editForm ) //判断如果修改失败,就做提示 if (res.meta.status !== 200) return this.$message.error('修改用户失败') //修改成功的提示 this.$message.success('修改用户成功') //关闭对话框 this.editDialogVisible = false //重新请求最新的数据 this.getUserList() }) } 2.删除用户在点击删除按钮的时候,我们应该跳出提示信息框,让用户确认要进行删除操作。如果想要使用确认取消提示框,我们需要先将提示信息框挂载到vue中。A.导入MessageBox组件,并将MessageBox组件挂载到实例。Vue.prototype.$confirm = MessageBox.confirmB.给用户列表中的删除按钮添加事件,并在事件处理函数中弹出确定取消窗,最后再根据id发送删除用户的请求async removeUserById(id){ //弹出确定取消框,是否删除用户 const confirmResult = await this.$confirm('请问是否要永久删除该用户','删除提示',{ confirmButtonText:'确认删除', cancelButtonText:'取消', type:'warning' }).catch(err=>err) //如果用户点击确认,则confirmResult 为'confirm' //如果用户点击取消, 则confirmResult获取的就是catch的错误消息'cancel' if(confirmResult != "confirm"){ return this.$message.info("已经取消删除") } //发送请求根据id完成删除操作 const {data:res} = await this.$http.delete('users/'+id) //判断如果删除失败,就做提示 if (res.meta.status !== 200) return this.$message.error('删除用户失败') //修改成功的提示 this.$message.success('删除用户成功') //重新请求最新的数据 this.getUserList() } 3.推送代码创建user子分支,并将代码推送到码云A.创建user子分支 git checkout -b userB.将代码添加到暂存区 git add .C.将代码提交并注释 git commit -m '添加完成用户列表功能'D.将本地的user分支推送到码云 git push -u origin userE.将user分支代码合并到master:切换到master git checkout master合并user git merge userF.将本地master分支的代码推送到码云 git push创建rights子分支A.创建rights子分支 git checkout -b rightsB.将本地的rights分支推送到码云 git push -u origin rights4.权限列表A.添加权限列表路由创建权限管理组件(Rights.vue),并在router.js添加对应的路由规则import Rights from './components/power/Rights.vue' ...... path: '/home', component: Home, redirect: '/welcome', children: [ { path: "/welcome", component: Welcome }, { path: "/users", component: Users }, { path: "/rights", component: Rights } ] ...... B.添加面包屑导航在Rights.vue中添加面包屑组件展示导航路径C.显示数据在data中添加一个rightsList数据,在methods中提供一个getRightsList方法发送请求获取权限列表数据,在created中调用这个方法获取数据<el-table :data="rightsList" stripe> <el-table-column type="index"></el-table-column> <el-table-column label="权限名称" prop="authName"></el-table-column> <el-table-column label="路径" prop="path"></el-table-column> <el-table-column label="权限等级" prop="level"> <template slot-scope="scope"> <el-tag v-if="scope.row.level === 0">一级权限</el-tag> <el-tag v-if="scope.row.level === 1" type="success">二级权限</el-tag> <el-tag v-if="scope.row.level === 2" type="warning">三级权限</el-tag> </template> </el-table-column> </el-table> <script> export default { data(){ return { //列表形式的权限 rightsList:[] } }, created(){ this.getRightsList(); }, methods:{ async getRightsList(){ const {data:res} = await this.$http.get('rights/list') //如果返回状态为异常状态则报错并返回 if (res.meta.status !== 200) return this.$message.error('获取权限列表失败') //如果返回状态正常,将请求的数据保存在data中 this.rightsList = res.data } } } </script> 5.角色列表A.添加角色列表路由添加角色列表子组件(power/Roles.vue),并添加对应的规则path: '/home', component: Home, redirect: '/welcome', children: [ { path: "/welcome", component: Welcome }, { path: "/users", component: Users }, { path: "/rights", component: Rights }, { path: "/roles", component: Roles } ] B.添加面包屑导航在Roles.vue中添加面包屑组件展示导航路径C.显示数据在data中添加一个roleList数据,在methods中提供一个getRoleList方法发送请求获取权限列表数据,在created中调用这个方法获取数据<!-- 角色列表区域 --> <!-- row-key="id" 是2019年3月提供的新特性, if there's nested data, rowKey is required. 如果这是一个嵌套的数据,rowkey 是必须添加的属性 --> <el-table row-key="id" :data="roleList" border> <!-- 添加展开列 --> <el-table-column type="expand"></el-table-column> <el-table-column type="index"></el-table-column> <el-table-column label="角色名称" prop="roleName"></el-table-column> <el-table-column label="角色描述" prop="roleDesc"></el-table-column> <el-table-column label="操作" width="300px"> <template slot-scope="scope"> <el-button size="mini" type="primary" icon="el-icon-edit">编辑</el-button> <el-button size="mini" type="danger" icon="el-icon-delete">删除</el-button> <el-button size="mini" type="warning" icon="el-icon-setting">分配权限</el-button> </template> </el-table-column> </el-table> <script> export default { data(){ return { roleList:[] } },created(){ this.getRoleList(); },methods:{ async getRoleList(){ const {data:res} = await this.$http.get('roles') //如果返回状态为异常状态则报错并返回 // if (res.meta.status !== 200) // return this.$message.error('获取角色列表失败') // //如果返回状态正常,将请求的数据保存在data中 // this.roleList = res.data console.log(res.data) this.roleList = res.data; } } } </script> D.补充说明之前学习过类似的添加角色,删除角色,编辑角色请参照之前编写过的代码还有接口文档完成效果。E.生成权限列表使用三重嵌套for循环生成权限下拉列表<!-- 添加展开列 --> <el-table-column type="expand"> <template slot-scope="scope"> <el-row :class="['bdbottom',i1===0?'bdtop':'']" v-for="(item1,i1) in scope.row.children" :key="item1.id"> <!-- 渲染一级权限 --> <el-col :span="5"> <el-tag> {{item1.authName}} </el-tag> <i class="el-icon-caret-right"></i> </el-col> <!-- 渲染二,三级权限 --> <el-col :span="19"> <!-- 通过for循环嵌套渲染二级权限 --> <el-row :class="[i2===0?'':'bdtop' ]" v-for="(item2,i2) in item1.children" :key="item2.id"> <el-col :span="6"> <el-tag type="success">{{item2.authName}}</el-tag> <i class="el-icon-caret-right"></i> </el-col> <el-col :span="18"> <el-tag type="warning" v-for="(item3) in item2.children" :key="item3.id"> {{item3.authName}} </el-tag> </el-col> </el-row> </el-col> </el-row> </template> </el-table-column> F.美化样式通过设置global.css中的#app样式min-width:1366px 解决三级权限换行的问题,通过给一级权限el-row添加display:flex,align-items:center的方式解决一级权限垂直居中的问题,二级权限也类似添加,因为需要给多个内容添加,可以将这个样式设置为一个.vcenter{display:flex;align-items:center}G.添加权限删除功能给每一个权限的el-tag添加closable属性,是的权限右侧出现“X”图标再给el-tag添加绑定close事件处理函数removeRightById(scope.row,item1.id)removeRightById(scope.row,item2.id)removeRightById(scope.row,item3.id)async removeRightById(role,rightId){ //弹窗提示用户是否要删除 const confirmResult = await this.$confirm('请问是否要删除该权限','删除提示',{ confirmButtonText:'确认删除', cancelButtonText:'取消', type:'warning' }).catch(err=>err) //如果用户点击确认,则confirmResult 为'confirm' //如果用户点击取消, 则confirmResult获取的就是catch的错误消息'cancel' if(confirmResult != "confirm"){ return this.$message.info("已经取消删除") } //用户点击了确定表示真的要删除 //当发送delete请求之后,返回的数据就是最新的角色权限信息 const {data:res} = await this.$http.delete(`roles/${role.id}/rights/${rightId}`) if (res.meta.status !== 200) return this.$message.error('删除角色权限失败') //无需再重新加载所有权限 //只需要对现有的角色权限进行更新即可 role.children = res.data // this.getRoleList(); } H.完成权限分配功能先给分配权限按钮添加事件<el-button size="mini" type="warning" icon="el-icon-setting" @click="showSetRightDialog">分配权限在showSetRightDialog函数中请求权限树数据并显示对话框async showSetRightDialog() { //当点击分配权限按钮时,展示对应的对话框 this.setRightDialogVisible = true; //获取所有权限的数据 const {data:res} = await this.$http.get('rights/tree') //如果返回状态为异常状态则报错并返回 if (res.meta.status !== 200) return this.$message.error('获取权限树失败') //如果返回状态正常,将请求的数据保存在data中 this.rightsList = res.data } 添加分配权限对话框,并添加绑定数据setRightDialogVisible 这是一段信息 取 消 确 定 I.完成树形结构弹窗在element.js中引入Tree,注册Tree<!-- 分配权限对话框 --> <el-dialog title="分配权限" :visible.sync="setRightDialogVisible" width="50%" @close="setRightDialogClose"> <!-- 树形组件 show-checkbox:显示复选框 node-key:设置选中节点对应的值 default-expand-all:是否默认展开所有节点 :default-checked-keys 设置默认选中项的数组 ref:设置引用 --> <el-tree :data="rightsList" :props="treeProps" show-checkbox node-key="id" default-expand-all :default-checked-keys="defKeys" ref="treeRef"></el-tree> <span slot="footer" class="dialog-footer"> <el-button @click="setRightDialogVisible = false">取 消</el-button> <el-button type="primary" @click="allotRights">确 定</el-button> </span> </el-dialog> <script> export default { data() { return { //角色列表数据 roleList: [], //控制分配权限对话框的显示 setRightDialogVisible: false, //权限树数据 rightsList: [], //树形控件的属性绑定对象 treeProps: { //通过label设置树形节点文本展示authName label: 'authName', //设置通过children属性展示子节点信息 children: 'children' }, //设置树形控件中默认选中的内容 defKeys: [], //保存正在操作的角色id roleId:'' } }, created() { this.getRoleList() }, methods: { async getRoleList() { const { data: res } = await this.$http.get('roles') //如果返回状态为异常状态则报错并返回 if (res.meta.status !== 200) return this.$message.error('获取角色列表失败') //如果返回状态正常,将请求的数据保存在data中 // this.roleList = res.data console.log(res.data) this.roleList = res.data }, async removeRightById(role, rightId) { //弹窗提示用户是否要删除 const confirmResult = await this.$confirm( '请问是否要删除该权限', '删除提示', { confirmButtonText: '确认删除', cancelButtonText: '取消', type: 'warning' } ).catch(err => err) //如果用户点击确认,则confirmResult 为'confirm' //如果用户点击取消, 则confirmResult获取的就是catch的错误消息'cancel' if (confirmResult != 'confirm') { return this.$message.info('已经取消删除') } //用户点击了确定表示真的要删除 //当发送delete请求之后,返回的数据就是最新的角色权限信息 const { data: res } = await this.$http.delete( `roles/${role.id}/rights/${rightId}` ) if (res.meta.status !== 200) return this.$message.error('删除角色权限失败') //无需再重新加载所有权限 //只需要对现有的角色权限进行更新即可 role.children = res.data // this.getRoleList(); }, async showSetRightDialog(role) { //将role.id保存起来以供保存权限时使用 this.roleId = role.id; //获取所有权限的数据 const { data: res } = await this.$http.get('rights/tree') //如果返回状态为异常状态则报错并返回 if (res.meta.status !== 200) return this.$message.error('获取权限树失败') //如果返回状态正常,将请求的数据保存在data中 this.rightsList = res.data //调用getLeafKeys进行递归,将三级权限添加到数组中 this.getLeafKeys(role, this.defKeys) //当点击分配权限按钮时,展示对应的对话框 this.setRightDialogVisible = true console.log(this.defKeys) }, getLeafKeys(node, arr) { //该函数会获取到当前角色的所有三级权限id并添加到defKeys中 //如果当前节点不包含children属性,则表示node为三级权限 if (!node.children) { return arr.push(node.id) } //递归调用 node.children.forEach(item => this.getLeafKeys(item, arr)) }, setRightDialogClose() { //当用户关闭树形权限对话框的时候,清除掉所有选中状态 this.defKeys = [] }, async allotRights() { //当用户在树形权限对话框中点击确定,将用户选择的 //权限发送请求进行更新 //获取所有选中及半选的内容 const keys = [ ...this.$refs.treeRef.getCheckedKeys(), ...this.$refs.treeRef.getHalfCheckedKeys() ] //将数组转换为 , 拼接的字符串 const idStr = keys.join(',') //发送请求完成更新 const { data: res } = await this.$http.post( `roles/${this.roleId}/rights`, { rids:idStr } ) if (res.meta.status !== 200) return this.$message.error('分配权限失败') this.$message.success("分配权限成功") this.getRoleList(); //关闭对话框 this.setRightDialogVisible = false; } } } </script> 6.分配角色打开Users.vue,完成分配角色的功能A.添加分配角色对话框<!-- 分配角色对话框 --> <el-dialog title="分配角色" :visible.sync="setRoleDialogVisible" width="50%"> <div> <p>当前的用户:{{userInfo.username}}</p> <p>当前的角色:{{userInfo.role_name}}</p> <p>分配新角色:</p> </div> <span slot="footer" class="dialog-footer"> <el-button @click="setRoleDialogVisible = false">取 消</el-button> <el-button type="primary" @click="setRoleDialogVisible = false">确 定</el-button> </span> </el-dialog> B.给分配角色按钮添加点击事件,点击之后弹出一个对话框进行角色分配<!-- 分配角色 --> <el-tooltip class="item" effect="dark" content="分配角色" placement="top" :enterable="false"> <el-button type="warning" icon="el-icon-setting" size='mini' @click="setRole(scope.row)"></el-button> </el-tooltip> data(){ ...... //控制显示分配角色对话框 setRoleDialogVisible:false, //保存正在操作的那个用户信息 userInfo:{}, //保存所有的角色信息 rolesList:[], //保存用户选中的角色id selectedRoleId:'' }, methods:{ ...... async setRole( userInfo ){ //保存起来以供后续使用 this.userInfo = userInfo; //获取所有的角色信息,以备下拉列表使用 //发送请求根据id完成删除操作 const { data: res } = await this.$http.get('roles') //判断如果删除失败,就做提示 if (res.meta.status !== 200) return this.$message.error('获取角色列表失败') this.rolesList = res.data; //展示分配角色对话框 this.setRoleDialogVisible = true; } } C.在element.js中引入Select,Option,注册Select,Option<!-- 角色选择下拉框 v-model:设置用户选中角色之后的id绑定数据 --> <el-select v-model="selectedRoleId" placeholder="请选择角色"> <!-- :label 显示文本,:value 选中值 --> <el-option v-for="item in rolesList" :key="item.id" :label="item.roleName" :value="item.id"> </el-option> </el-select> D.当用户点击对话框中的确定之后,完成分配角色的操作<!-- 分配角色对话框 --> <el-dialog title="分配角色" :visible.sync="setRoleDialogVisible" width="50%" @close="setRoleDialogClosed"> <div> <p>当前的用户:{{userInfo.username}}</p> <p>当前的角色:{{userInfo.role_name}}</p> <p>分配新角色: <!-- 角色选择下拉框 v-model:设置用户选中角色之后的id绑定数据 --> <el-select v-model="selectedRoleId" placeholder="请选择角色"> <!-- :label 显示文本,:value 选中值 --> <el-option v-for="item in rolesList" :key="item.id" :label="item.roleName" :value="item.id"> </el-option> </el-select> </p> </div> <span slot="footer" class="dialog-footer"> <el-button @click="setRoleDialogVisible = false">取 消</el-button> <el-button type="primary" @click="saveRoleInfo">确 定</el-button> </span> </el-dialog> methods:{ ....... async saveRoleInfo(){ //当用户点击确定按钮之后 //判断用户是否选择了需要分配的角色 if(!this.selectedRoleId){ return this.$message.error('请选择需要分配的角色') } //发送请求完成分配角色的操作 const {data:res} = await this.$http.put(`users/${this.userInfo.id}/role`,{rid:this.selectedRoleId}) //判断如果删除失败,就做提示 if (res.meta.status !== 200) return this.$message.error('分配角色失败') this.$message.success('分配角色成功') this.getUserList(); //关闭对话框 this.setRoleDialogVisible = false }, setRoleDialogClosed(){ //当关闭对话框的时候,重置下拉框中的内容 this.selectedRoleId = '' this.userInfo = {} } } 7.将代码推送到码云A.将代码推送到暂存区 git add .B.将代码提交到仓库 git commit -m '完成了权限功能开发'C.将rights分支代码推送到码云 git pushD.将代码合并到mastergit checkout mastergit merge rightsE.将master代码推送到码云git push
-
后台基本布局 打开Home.vue组件,进行布局:<el-container class="home-container"> <!-- 头部区域 --> <el-header>Header<el-button type="info" @click="logout"> 退出 </el-button></el-header> <!-- 页面主体区域 --> <el-container> <!-- 侧边栏 --> <el-aside width="200px">Aside</el-aside> <!-- 主体结构 --> <el-main>Main</el-main> </el-container> </el-container> 默认情况下,跟element-ui组件同名的类名可以帮助我们快速的给对应的组件添加样式,如:.home-container { height: 100%; } .el-header{ background-color:#373D41; } .el-aside{ background-color:#333744; } .el-main{ background-color:#eaedf1; } 2.顶部布局,侧边栏布局<template> <el-container class="home-container"> <!-- 头部区域 --> <el-header> <div> <!-- 黑马logo --> <img src="../assets/heima.png" alt=""> <!-- 顶部标题 --> <span>电商后台管理系统</span> </div> <el-button type="info" @click="logout"> 退出 </el-button> </el-header> <!-- 页面主体区域 --> <el-container> <!-- 侧边栏 --> <el-aside width="200px"> <!-- 侧边栏菜单 --> <el-menu background-color="#333744" text-color="#fff" active-text-color="#ffd04b"> <!-- 一级菜单 --> <el-submenu index="1"> <!-- 一级菜单模板 --> <template slot="title"> <!-- 图标 --> <i class="el-icon-location"></i> <!-- 文本 --> <span>导航一</span> </template> <!-- 二级子菜单 --> <el-menu-item index="1-4-1"> <!-- 二级菜单模板 --> <template slot="title"> <!-- 图标 --> <i class="el-icon-location"></i> <!-- 文本 --> <span>子菜单一</span> </template> </el-menu-item> </el-submenu> </el-menu> </el-aside> <!-- 主体结构 --> <el-main>Main</el-main> </el-container> </el-container> </template> 3.axios请求拦截器后台除了登录接口之外,都需要token权限验证,我们可以通过添加axios请求拦截器来添加token,以保证拥有获取数据的权限在main.js中添加代码,在将axios挂载到vue原型之前添加下面的代码//请求在到达服务器之前,先会调用use中的这个回调函数来添加请求头信息 axios.interceptors.request.use(config=>{ //为请求头对象,添加token验证的Authorization字段 config.headers.Authorization = window.sessionStorage.getItem("token") return config }) 4.请求侧边栏数据<script> export default { data() { return { // 左侧菜单数据 menuList: null } }, created() { // 在created阶段请求左侧菜单数据 this.getMenuList() }, methods: { logout() { window.sessionStorage.clear() this.$router.push('/login') }, async getMenuList() { // 发送请求获取左侧菜单数据 const { data: res } = await this.$http.get('menus') if (res.meta.status !== 200) return this.$message.error(res.meta.msg) this.menuList = res.data console.log(res) } } } </script> 通过v-for双重循环渲染左侧菜单<el-menu background-color="#333744" text-color="#fff" active-text-color="#ffd04b"> <!-- 一级菜单 --> <el-submenu :index="item.id+''" v-for="item in menuList" :key="item.id"> <!-- 一级菜单模板 --> <template slot="title"> <!-- 图标 --> <i class="el-icon-location"></i> <!-- 文本 --> <span>{{item.authName}}</span> </template> <!-- 二级子菜单 --> <el-menu-item :index="subItem.id+''" v-for="subItem in item.children" :key="subItem.id"> <!-- 二级菜单模板 --> <template slot="title"> <!-- 图标 --> <i class="el-icon-location"></i> <!-- 文本 --> <span>{{subItem.authName}}</span> </template> </el-menu-item> </el-submenu> </el-menu> 5.设置激活子菜单样式通过更改el-menu的active-text-color属性可以设置侧边栏菜单中点击的激活项的文字颜色通过更改菜单项模板(template)中的i标签的类名,可以将左侧菜单栏的图标进行设置,我们需要在项目中使用第三方字体图标在数据中添加一个iconsObj:iconsObj: { '125':'iconfont icon-user', '103':'iconfont icon-tijikongjian', '101':'iconfont icon-shangpin', '102':'iconfont icon-danju', '145':'iconfont icon-baobiao' } 然后将图标类名进行数据绑定,绑定iconsObj中的数据:为了保持左侧菜单每次只能打开一个,显示其中的子菜单,我们可以在el-menu中添加一个属性unique-opened或者也可以数据绑定进行设置(此时true认为是一个bool值,而不是字符串) :unique-opened="true"6.制作侧边菜单栏的伸缩功能在菜单栏上方添加一个div <!-- 侧边栏,宽度根据是否折叠进行设置 --> <el-aside :width="isCollapse ? '64px':'200px'"> <!-- 伸缩侧边栏按钮 --> <div class="toggle-button" @click="toggleCollapse">|||</div> <!-- 侧边栏菜单,:collapse="isCollapse"(设置折叠菜单为绑定的 isCollapse 值),:collapse-transition="false"(关闭默认的折叠动画) --> <el-menu :collapse="isCollapse" :collapse-transition="false" ...... 然后给div添加样式,给div添加事件:|||7.在后台首页添加子级路由新增子级路由组件Welcome.vue在router.js中导入子级路由组件,并设置路由规则以及子级路由的默认重定向打开Home.vue,在main的主体结构中添加一个路由占位符制作好了Welcome子级路由之后,我们需要将所有的侧边栏二级菜单都改造成子级路由链接我们只需要将el-menu的router属性设置为true就可以了,此时当我们点击二级菜单的时候,就会根据菜单的index属性进行路由跳转,如: /110,使用index id来作为跳转的路径不合适,我们可以重新绑定index的值为 :index="'/'+subItem.path"8.完成用户列表主体区域新建用户列表组件 user/Users.vue在router.js中导入子级路由组件Users.vue,并设置路由规则当点击二级菜单的时候,被点击的二级子菜单并没有高亮,我们需要正在被使用的功能高亮显示我们可以通过设置el-menu的default-active属性来设置当前激活菜单的index但是default-active属性也不能写死,固定为某个菜单值所以我们可以先给所有的二级菜单添加点击事件,并将path值作为方法的参数@click="saveNavState('/'+subItem.path)"在saveNavState方法中将path保存到sessionStorage中saveNavState( path ){//点击二级菜单的时候保存被点击的二级菜单信息window.sessionStorage.setItem("activePath",path);this.activePath = path;}然后在数据中添加一个activePath绑定数据,并将el-menu的default-active属性设置为activePath最后在created中将sessionStorage中的数据赋值给activePaththis.activePath = window.sessionStorage.getItem("activePath")9.绘制用户列表基本结构A.使用element-ui面包屑组件完成顶部导航路径(复制面包屑代码,在element.js中导入组件Breadcrumb,BreadcrumbItem)B.使用element-ui卡片组件完成主体表格(复制卡片组件代码,在element.js中导入组件Card),再使用element-ui输入框完成搜索框及搜索按钮,此时我们需要使用栅格布局来划分结构(复制卡片组件代码,在element.js中导入组件Row,Col),然后再使用el-button制作添加用户按钮<div> <h3>用户列表组件</h3> <!-- 面包屑导航 --> <el-breadcrumb separator="/"> <el-breadcrumb-item :to="{ path: '/home' }">首页</el-breadcrumb-item> <el-breadcrumb-item>用户管理</el-breadcrumb-item> <el-breadcrumb-item>用户列表</el-breadcrumb-item> </el-breadcrumb> <!-- 卡片视图区域 --> <el-card> <!-- 搜索与添加区域 --> <el-row :gutter="20"> <el-col :span="7"> <el-input placeholder="请输入内容"> <el-button slot="append" icon="el-icon-search"></el-button> </el-input> </el-col> <el-col :span="4"> <el-button type="primary">添加用户</el-button> </el-col> </el-row> </el-card> </div> 10.请求用户列表数据<script> export default { data() { return { //获取查询用户信息的参数 queryInfo: { query: '', pagenum: 1, pagesize: 2 }, //保存请求回来的用户列表数据 userList:[], total:0 } }, created() { this.getUserList() }, methods: { async getUserList() { //发送请求获取用户列表数据 const { res: data } = await this.$http.get('users', { params: this.queryInfo }) //如果返回状态为异常状态则报错并返回 if (res.meta.status !== 200) return this.$message.error('获取用户列表失败') //如果返回状态正常,将请求的数据保存在data中 this.userList = res.data.users; this.total = res.data.total; } } } </script> 11.将用户列表数据展示使用表格来展示用户列表数据,使用element-ui表格组件完成列表展示数据(复制表格代码,在element.js中导入组件Table,TableColumn)在渲染展示状态时,会使用作用域插槽获取每一行的数据再使用switch开关组件展示状态信息(复制开关组件代码,在element.js中导入组件Switch)而渲染操作列时,也是使用作用域插槽来进行渲染的,在操作列中包含了修改,删除,分配角色按钮,当我们把鼠标放到分配角色按钮上时希望能有一些文字提示,此时我们需要使用文字提示组件(复制文字提示组件代码,在element.js中导入组件Tooltip),将分配角色按钮包含代码结构如下:<!-- 用户列表(表格)区域 --> <el-table :data="userList" border stripe> <el-table-column type="index"></el-table-column> <el-table-column label="姓名" prop="username"></el-table-column> <el-table-column label="邮箱" prop="email"></el-table-column> <el-table-column label="电话" prop="mobile"></el-table-column> <el-table-column label="角色" prop="role_name"></el-table-column> <el-table-column label="状态"> <template slot-scope="scope"> <el-switch v-model="scope.row.mg_state"></el-switch> </template> </el-table-column> <el-table-column label="操作" width="180px"> <template slot-scope="scope"> <!-- 修改 --> <el-button type="primary" icon="el-icon-edit" size='mini'></el-button> <!-- 删除 --> <el-button type="danger" icon="el-icon-delete" size='mini'></el-button> <!-- 分配角色 --> <el-tooltip class="item" effect="dark" content="分配角色" placement="top" :enterable="false"> <el-button type="warning" icon="el-icon-setting" size='mini'></el-button> </el-tooltip> </template> </el-table-column> </el-table> 12.实现用户列表分页A.使用表格来展示用户列表数据,可以使用分页组件完成列表分页展示数据(复制分页组件代码,在element.js中导入组件Pagination)B.更改组件中的绑定数据<!-- 分页导航区域 @size-change(pagesize改变时触发) @current-change(页码发生改变时触发) :current-page(设置当前页码) :page-size(设置每页的数据条数) :total(设置总页数) --> <el-pagination @size-change="handleSizeChange" @current-change="handleCurrentChange" :current-page="queryInfo.pagenum" :page-sizes="[1, 2, 5, 10]" :page-size="queryInfo.pagesize" layout="total, sizes, prev, pager, next, jumper" :total="total"> </el-pagination> C.添加两个事件的事件处理函数@size-change,@current-changehandleSizeChange(newSize) { //pagesize改变时触发,当pagesize发生改变的时候,我们应该 //以最新的pagesize来请求数据并展示数据 // console.log(newSize) this.queryInfo.pagesize = newSize; //重新按照pagesize发送请求,请求最新的数据 this.getUserList(); }, handleCurrentChange( current ) { //页码发生改变时触发当current发生改变的时候,我们应该 //以最新的current页码来请求数据并展示数据 // console.log(current) this.queryInfo.pagenum = current; //重新按照pagenum发送请求,请求最新的数据 this.getUserList(); } 13.实现更新用户状态当用户点击列表中的switch组件时,用户的状态应该跟随发生改变。A.首先监听用户点击switch组件的事件,并将作用域插槽的数据当做事件参数进行传递<el-switch v-model="scope.row.mg_state" @change="userStateChanged(scope.row)"></el-switch> B.在事件中发送请求完成状态的更改async userStateChanged(row) { //发送请求进行状态修改 const { data: res } = await this.$http.put( `users/${row.id}/state/${row.mg_state}` ) //如果返回状态为异常状态则报错并返回 if (res.meta.status !== 200) { row.mg_state = !row.mg_state return this.$message.error('修改状态失败') } this.$message.success('更新状态成功') }, 14.实现搜索功能添加数据绑定,添加搜索按钮的点击事件(当用户点击搜索按钮的时候,调用getUserList方法根据文本框内容重新请求用户列表数据)当我们在输入框中输入内容并点击搜索之后,会按照搜索关键字搜索,我们希望能够提供一个X删除搜索关键字并重新获取所有的用户列表数据,只需要给文本框添加clearable属性并添加clear事件,在clear事件中重新请求数据即可<el-col :span="7"> <el-input placeholder="请输入内容" v-model="queryInfo.query" clearable @clear="getUserList"> <el-button slot="append" icon="el-icon-search" @click="getUserList"></el-button> </el-input> </el-col> 15.实现添加用户A.当我们点击添加用户按钮的时候,弹出一个对话框来实现添加用户的功能,首先我们需要复制对话框组件的代码并在element.js文件中引入Dialog组件B.接下来我们要为“添加用户”按钮添加点击事件,在事件中将addDialogVisible设置为true,即显示对话框C.更改Dialog组件中的内容<!-- 对话框组件 :visible.sync(设置是否显示对话框) width(设置对话框的宽度) :before-close(在对话框关闭前触发的事件) --> <el-dialog title="添加用户" :visible.sync="addDialogVisible" width="50%"> <!-- 对话框主体区域 --> <el-form :model="addForm" :rules="addFormRules" ref="addFormRef" label-width="70px"> <el-form-item label="用户名" prop="username"> <el-input v-model="addForm.username"></el-input> </el-form-item> <el-form-item label="密码" prop="password"> <el-input v-model="addForm.password"></el-input> </el-form-item> <el-form-item label="邮箱" prop="email"> <el-input v-model="addForm.email"></el-input> </el-form-item> <el-form-item label="电话" prop="mobile"> <el-input v-model="addForm.mobile"></el-input> </el-form-item> </el-form> <!-- 对话框底部区域 --> <span slot="footer" class="dialog-footer"> <el-button @click="addDialogVisible = false">取 消</el-button> <el-button type="primary" @click="addDialogVisible = false">确 定</el-button> </span> </el-dialog> D.添加数据绑定和校验规则:data() { //验证邮箱的规则 var checkEmail = (rule, value, cb) => { const regEmail = /^\w+@\w+(\.\w+)+$/ if (regEmail.test(value)) { return cb() } //返回一个错误提示 cb(new Error('请输入合法的邮箱')) } //验证手机号码的规则 var checkMobile = (rule, value, cb) => { const regMobile = /^1[34578]\d{9}$/ if (regMobile.test(value)) { return cb() } //返回一个错误提示 cb(new Error('请输入合法的手机号码')) } return { //获取查询用户信息的参数 queryInfo: { // 查询的条件 query: '', // 当前的页数,即页码 pagenum: 1, // 每页显示的数据条数 pagesize: 2 }, //保存请求回来的用户列表数据 userList: [], total: 0, //是否显示添加用户弹出窗 addDialogVisible: false, // 添加用户的表单数据 addForm: { username: '', password: '', email: '', mobile: '' }, // 添加表单的验证规则对象 addFormRules: { username: [ { required: true, message: '请输入用户名称', trigger: 'blur' }, { min: 3, max: 10, message: '用户名在3~10个字符之间', trigger: 'blur' } ], password: [ { required: true, message: '请输入密码', trigger: 'blur' }, { min: 6, max: 15, message: '用户名在6~15个字符之间', trigger: 'blur' } ], email: [ { required: true, message: '请输入邮箱', trigger: 'blur' }, { validator:checkEmail, message: '邮箱格式不正确,请重新输入', trigger: 'blur'} ], mobile: [ { required: true, message: '请输入手机号码', trigger: 'blur' }, { validator:checkMobile, message: '手机号码不正确,请重新输入', trigger: 'blur'} ] } } } E.当关闭对话框时,重置表单给el-dialog添加@close事件,在事件中添加重置表单的代码methods:{ .... addDialogClosed(){ //对话框关闭之后,重置表达 this.$refs.addFormRef.resetFields(); } } F.点击对话框中的确定按钮,发送请求完成添加用户的操作首先给确定按钮添加点击事件,在点击事件中完成业务逻辑代码methods:{ .... addUser(){ //点击确定按钮,添加新用户 //调用validate进行表单验证 this.$refs.addFormRef.validate( async valid => { if(!valid) return this.$message.error("请填写完整用户信息"); //发送请求完成添加用户的操作 const {data:res} = await this.$http.post("users",this.addForm) //判断如果添加失败,就做提示 if (res.meta.status !== 200) return this.$message.error('添加用户失败') //添加成功的提示 this.$message.success("添加用户成功") //关闭对话框 this.addDialogVisible = false //重新请求最新的数据 this.getUserList() }) } }
-
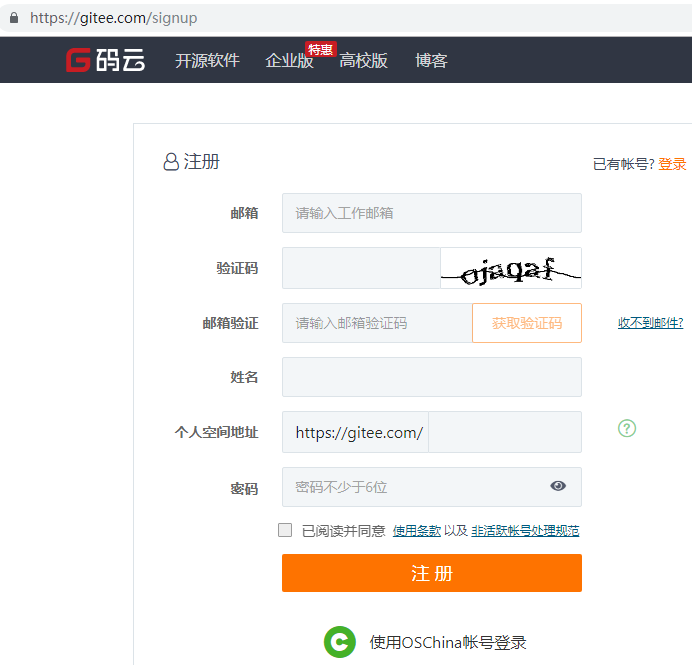
vue电商业务概述 客户使用的业务服务:PC端,小程序,移动web,移动app管理员使用的业务服务:PC后台管理端。PC后台管理端的功能:管理用户账号(登录,退出,用户管理,权限管理),商品管理(商品分类,分类参数,商品信息,订单),数据统计电商后台管理系统采用前后端分离的开发模式前端项目是基于Vue的SPA(单页应用程序)项目前端技术栈:Vue,Vue-Router,Element-UI,Axios,Echarts后端技术栈:Node.js,Express,Jwt(模拟session),Mysql,Sequelize(操作数据库的框架)2.项目初始化A.安装Vue脚手架B.通过脚手架创建项目C.配置路由D.配置Element-UI:在插件中安装,搜索vue-cli-plugin-elementE.配置Axios:在依赖中安装,搜索axios(运行依赖)F.初始化git仓库G.将本地项目托管到github或者码云中3.码云相关操作A.注册登录码云账号B.安装git在Windows上使用Git,可以从Git官网直接下载安装程序进行安装。测试命令:git --versionC.点击网站右上角“登录”,登录码云,并进行账号设置D.在本地创建公钥:在终端运行:ssh-keygen -t rsa -C "xxx@xxx.com"E.找到公钥地址:Your identification has been saved in /c/Users/My/.ssh/id_rsa.Your public key has been saved in /c/Users/My/.ssh/id_rsa.pub.当我们创建公钥完毕之后,请注意打印出来的信息“Your public key has been saved in”/c/Users/My/.ssh/id_rsa.pub : c盘下面的Users下面的My下面的.ssh下面的id_rsa.pub就是我们创建好的公钥了E.打开id_rsa.pub文件,复制文件中的所有代码,点击码云中的SSH公钥,将生成的公钥复制到公钥中G.测试公钥:打开终端,输入命令ssh -T git@gitee.comH.将本地代码托管到码云中点击码云右上角的+号->新建仓库I.进行git配置:打开项目所在位置的终端,进行git仓库关联4.配置后台项目A.安装phpStudy并导入mysql数据库数据B.安装nodeJS,配置后台项目,从终端打开后台项目vue_api_server然后在终端中输入命令安装项目依赖包:npm installC.使用postman测试api接口5.实现登录功能A.登录状态保持如果服务器和客户端同源,建议可以使用cookie或者session来保持登录状态如果客户端和服务器跨域了,建议使用token进行维持登录状态。B.登录逻辑:在登录页面输入账号和密码进行登录,将数据发送给服务器服务器返回登录的结果,登录成功则返回数据中带有token客户端得到token并进行保存,后续的请求都需要将此token发送给服务器,服务器会验证token以保证用户身份。C.添加新分支login,在login分支中开发当前项目vue_shop:打开vue_shop终端,使用git status确定当前项目状态。确定当前工作目录是干净的之后,创建一个分支进行开发,开发完毕之后将其合并到mastergit checkout -b login然后查看新创建的分支:git branch确定我们正在使用login分支进行开发然后执行vue ui命令打开ui界面,然后运行serve,运行app查看当前项目效果发现现在是一个默认页面,我们需要进行更改,打开项目的src目录,点击main.js文件(入口文件)import Vue from 'vue' import App from './App.vue' import router from './router' import './plugins/element.js' Vue.config.productionTip = false new Vue({ router, render: h => h(App) }).$mount('#app') 再打开App.vue(根组件),将根组件的内容进行操作梳理(template中留下根节点,script中留下默认导出,去掉组件,style中去掉所有样式)<template> <div id="app"> <router-view></router-view> </div> </template> <script> export default { name: 'app' } </script> <style> </style> 再打开router.js(路由),将routes数组中的路由规则清除,然后将views删除,将components中的helloworld.vue删除import Vue from 'vue' import Router from 'vue-router' Vue.use(Router) export default new Router({ routes: [ ] }) 在components文件夹中新建Login.vue组件,添加template,script,style标签,style标签中的scoped可以防止组件之间的样式冲突,没有scoped则样式是全局的<template> <div class="login_container"> </div> </template> <script> export default { } </script> <style lang="less" scoped> .login_container { background-color: #2b5b6b; height: 100%; } </style> 在router.js中导入组件并设置规则在App.vue中添加路由占位符const router = new Router({ routes: [ { path: '/', redirect: '/login' }, { path: '/login', component: Login } ] }) 当我们给Login.vue中的内容添加样式的时候,会报错“缺少less-loader”,需要配置less加载器(开发依赖),安装less(开发依赖)然后需要添加公共样式,在assets文件夹下面添加css文件夹,创建global.css文件,添加全局样式/* 全局样式表 */ html,body,#app{ width: 100%; height: 100%; margin: 0; padding: 0; } 在main.js中导入global.css,使得全局样式生效 import "./assets/css/global.css"然后Login.vue中的根元素也需要设置撑满全屏(height:100%)最终Login.vue文件中的代码如下<template> <div class="login_container"> <!-- 登录盒子 --> <div class="login_box"> <!-- 头像 --> <div class="avatar_box"> <img src="../assets/logo.png" alt=""> </div> <!-- 登录表单 --> <el-form :model="loginForm" ref="LoginFormRef" :rules="loginFormRules" label-width="0px" class="login_form"> <!-- 用户名 --> <el-form-item prop="username"> <el-input v-model="loginForm.username" prefix-icon="iconfont icon-user" ></el-input> </el-form-item> <!-- 密码 --> <el-form-item prop="password"> <el-input type="password" v-model="loginForm.password" prefix-icon="iconfont icon-3702mima"></el-input> </el-form-item> <!-- 按钮 --> <el-form-item class="btns"> <el-button type="primary" @click="login">登录</el-button> <el-button type="info" @click="resetLoginForm">重置</el-button> </el-form-item> </el-form> </div> </div> </template> <script> export default { data() { return { //数据绑定 loginForm: { username: 'admin', password: '123456' }, //表单验证规则 loginFormRules: { username: [ { required: true, message: '请输入登录名', trigger: 'blur' }, { min: 3, max: 10, message: '登录名长度在 3 到 10 个字符', trigger: 'blur' } ], password: [ { required: true, message: '请输入密码', trigger: 'blur' }, { min: 6, max: 15, message: '密码长度在 6 到 15 个字符', trigger: 'blur' } ] } } }, //添加行为, methods: { //添加表单重置方法 resetLoginForm() { //this=>当前组件对象,其中的属性$refs包含了设置的表单ref // console.log(this) this.$refs.LoginFormRef.resetFields() }, login() { //点击登录的时候先调用validate方法验证表单内容是否有误 this.$refs.LoginFormRef.validate(async valid => { console.log(this.loginFormRules) //如果valid参数为true则验证通过 if (!valid) { return } //发送请求进行登录 const { data: res } = await this.$http.post('login', this.loginForm) // console.log(res); if (res.meta.status !== 200) { return this.$message.error('登录失败:' + res.meta.msg) //console.log("登录失败:"+res.meta.msg) } this.$message.success('登录成功') console.log(res) //保存token window.sessionStorage.setItem('token', res.data.token) // 导航至/home this.$router.push('/home') }) } } } </script> <style lang="less" scoped> .login_container { background-color: #2b5b6b; height: 100%; } .login_box { width: 450px; height: 300px; background: #fff; border-radius: 3px; position: absolute; left: 50%; top: 50%; transform: translate(-50%, -50%); .avatar_box { height: 130px; width: 130px; border: 1px solid #eee; border-radius: 50%; padding: 10px; box-shadow: 0 0 10px #ddd; position: absolute; left: 50%; transform: translate(-50%, -50%); background-color: #fff; img { width: 100%; height: 100%; border-radius: 50%; background-color: #eee; } } } .login_form { position: absolute; bottom: 0; width: 100%; padding: 0 20px; box-sizing: border-box; } .btns { display: flex; justify-content: flex-end; } </style> 其中我们有用到一下内容,需要进行进一步处理:A.添加element-ui的表单组件在plugins文件夹中打开element.js文件,进行elementui的按需导入import Vue from 'vue'import { Button } from 'element-ui'import { Form, FormItem } from 'element-ui'import { Input } from 'element-ui'Vue.use(Button)Vue.use(Form)Vue.use(FormItem)Vue.use(Input)B.添加第三方字体复制素材中的fonts文件夹到assets中,在入口文件main.js中导入import './assets/fonts/iconfont.css'然后直接在 接着添加登录盒子C.添加表单验证的步骤1).给添加属性:rules="rules",rules是一堆验证规则,定义在script、中2).在script中添加rules:export default{ data(){return{......, rules: {name: [{ required: true, message: '请输入活动名称', trigger: 'blur' },{ min: 3, max: 5, message: '长度在 3 到 5 个字符', trigger: 'blur' }],region: [{ required: true, message: '请选择活动区域', trigger: 'change' }]}......3).通过的prop属性设置验证规则4.导入axios以发送ajax请求打开main.js,import axios from 'axios';设置请求的根路径:axios.defaults.baseURL = 'http://127.0.0.1:8888/api/private/v1/';挂载axios:Vue.prototype.$http = axios;5.配置弹窗提示:在plugins文件夹中打开element.js文件,进行elementui的按需导入import {Message} from 'element-ui'进行全局挂载:Vue.prototype.$message = Message;在login.vue组件中编写弹窗代码:this.$message.error('登录失败')6.登录成功之后的操作A.登录成功之后,需要将后台返回的token保存到sessionStorage中操作完毕之后,需要跳转到/homelogin() { //点击登录的时候先调用validate方法验证表单内容是否有误 this.$refs.LoginFormRef.validate(async valid => { console.log(this.loginFormRules) //如果valid参数为true则验证通过 if (!valid) { return } //发送请求进行登录 const { data: res } = await this.$http.post('login', this.loginForm) // console.log(res); if (res.meta.status !== 200) { return this.$message.error('登录失败:' + res.meta.msg) //console.log("登录失败:"+res.meta.msg) } this.$message.success('登录成功') console.log(res) //保存token window.sessionStorage.setItem('token', res.data.token) // 导航至/home this.$router.push('/home') }) } 添加一个组件Home.vue,并为之添加规则<template> <div> this is home <el-button type="info" @click="logout"> 退出 </el-button> </div> </template> <script> export default { methods: { logout() { window.sessionStorage.clear() this.$router.push('/login') } } } </script> <style lang='less' scoped> </style> 添加路由规则const router = new Router({ routes: [ { path: '/', redirect: '/login' }, { path: '/login', component: Login }, { path: '/home', component: Home } ] }) 添加路由守卫如果用户没有登录,不能访问/home,如果用户通过url地址直接访问,则强制跳转到登录页面打开router.jsimport Vue from 'vue' import Router from 'vue-router' import Login from './components/Login.vue' import Home from './components/Home.vue' Vue.use(Router) const router = new Router({ routes: [ { path:'/', redirect:'/login'}, { path:'/login' , component:Login }, { path:'/home' , component:Home} ] }) //挂载路由导航守卫,to表示将要访问的路径,from表示从哪里来,next是下一个要做的操作 router.beforeEach((to,from,next)=>{ if(to.path === '/login') return next(); //获取token const tokenStr = window.sessionStorage.getItem('token'); if(!tokenStr) return next('/login'); next(); }) export default router 实现退出功能在Home组件中添加一个退出功能按钮,给退出按钮添加点击事件,添加事件处理代码如下:export default { methods:{ logout(){ window.sessionStorage.clear(); this.$router.push('/login'); } } } 补充A.处理ESLint警告打开脚手架面板,查看警告信息[图片]默认情况下,ESLint和vscode格式化工具有冲突,需要添加配置文件解决冲突。在项目根目录添加 .prettierrc 文件{ "semi":false, "singleQuote":true } 打开.eslintrc.js文件,禁用对 space-before-function-paren 的检查: rules: { 'no-console': process.env.NODE_ENV === 'production' ? 'error' : 'off', 'no-debugger': process.env.NODE_ENV === 'production' ? 'error' : 'off', 'space-before-function-paren' : 0 }, B.合并按需导入的element-uiimport Vue from 'vue' import { Button, Form, FormItem, Input, Message } from 'element-ui' Vue.use(Button) Vue.use(Form) Vue.use(FormItem) Vue.use(Input) // 进行全局挂载: Vue.prototype.$message = Message C.将代码提交到码云新建一个项目终端,输入命令‘git status’查看修改过的与新增的文件内容将所有文件添加到暂存区:git add .将所有代码提交到本地仓库:git commit -m "添加登录功能以及/home的基本结构"查看分支: git branch 发现所有代码都被提交到了login分支将login分支代码合并到master主分支,先切换到master:git checkout master在master分支进行代码合并:git merge login将本地的master推送到远端的码云:git push推送本地的子分支到码云,先切换到子分支:git checkout 分支名然后推送到码云:git push -u origin 远端分支名